No more cribs and a mobile toddler means one thing
in our house...no more organization in their room, gah!
Our youngest has recently transitioned to a toddler bed,
because of her mad monkey climbing skills. With that
comes baskets and clothing that was once neatly tucked
into shelves and folded ever so nicely, now thrown into
a tornado mess all over the floor. Soooo....the next option,
pile it up, as far away from those curious fingers as possible!
That worked BUT then we couldn't get to her clothing and she
began wearing the same outfits over and over again, so
the closet renovation began.
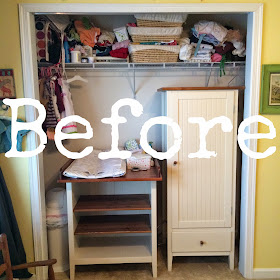
When we first moved in, all the closet sliding doors came
off in the kids rooms, because really, getting to only half
of your closet at a time is kind of a pain and little fingers
inevitably get pinched as they bang them closed. Not to
mention, taking off the doors adds more space to a room.
In a baby room, it's a great place to put the changing
table since it won't always be in their room and frees
up playable space on the floor too.
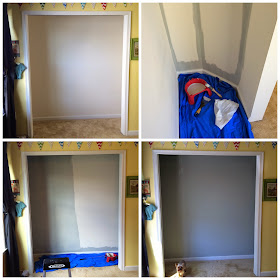
I removed all of the furniture, baskets, clothes, etc.
and then the hubs took down the wire shelf and filled
all of the holes, sanding them down when they were dry.
Then the fun part, adding a splash of light grey to tie
the closet together with the rest of the room.
I used Sleek Gray C15 from Lowes, Valspar Paint.
One coat did the trick and I even painted the ceiling
of the closet as well.
Our yorkie Satine, was my painting buddy and wanted
to be in a few of the photos to prove she was my
super assistant for the day.
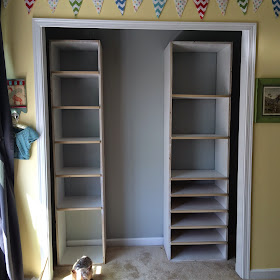
We wanted the closet to grow with our daughter
and building your own is a great way to customize
exactly what you are trying to accomplish.
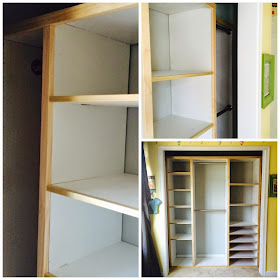
So my handy hubs went with a box/cube method and
used his new router for a much faster build. He also
stained the shelves outside with a spray painter and after
they were installed, I went back over and touched up spot
as well as stained the trim/facing.
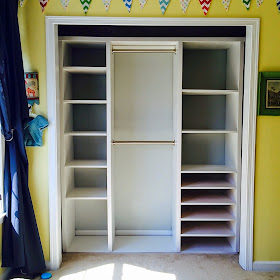
This photo shows you the sides of the main boxes.
To the left, you have long dress hanging and to the
right two rods for coats and warmer gear.
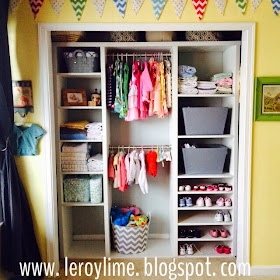
The closet is complete and now neatly organized
again. Thanks to my handy hubby for another
complete masterpiece!
Just a few more basket needed but otherwise
everything fits and there's room to grow!


No comments:
Post a Comment
Thanks for the comment sunshine! :)
If you comment anonymously, leave
your email if you would like to be contacted,
or I cannot reply back!