Showing posts with label Gold. Show all posts

10.13.2016

Gold Dipped Painted Letters - Teacher Gift

Looking for a golden way to thank your teachers this Christmas? These gold dipped painted letters are a great craft that your kids can paint in a jiffy!


I picked up the letters from a craft store, they are lightweight and made of hollow cardboard. The paint, I had on hand..just pulled out the colors and let my kids pick the ones they'd like to use. Paper plates made a great spot for paint, easy clean up and you only have brushes to clean.


The gold dipping is actually just a touch of spray paint, I waited a day to make sure the letters were completely dry before taping off the ends with green painter's tape and used a magazine to protect the rest of the letter from the gold spray. 


I thought they turned out super cute and my kids were very proud of their painting skills. 
You can't start thinking about Christmas gifts too early and if you start now, you won't be as frantic in December - happy painting!!

"anatomy of a gold dipped painted letter"


4.18.2016

Golden Umbrella Holder

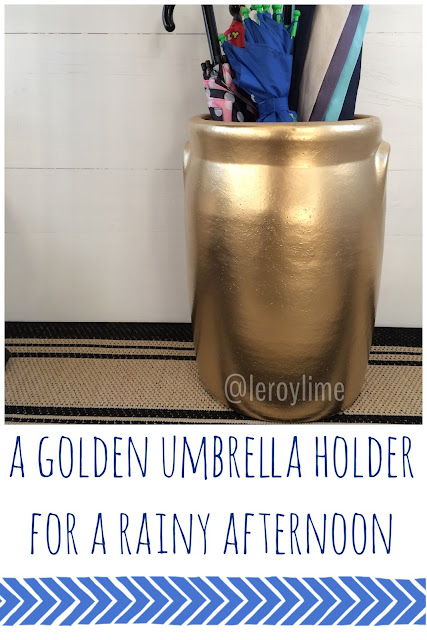
When it rains, perhaps you carry a brolly, umbrella, bumbershoot, parasol or gamp. No matter the name, I've got another easy DIY and the perfect spot to hold those useful shades until they are needed on rainy days!

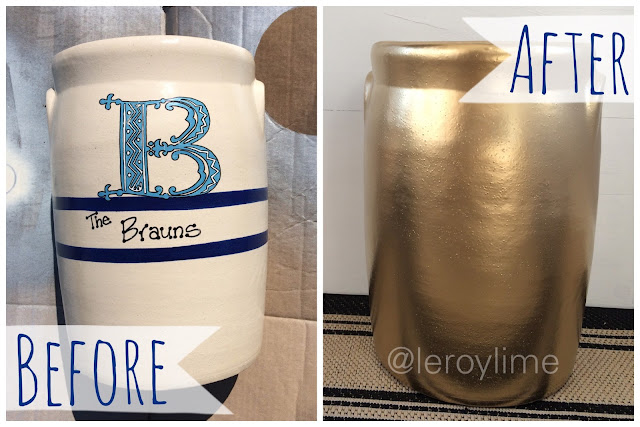
Golden Umbrella Holder - Quick spray paint DIY - LeroyLime

A passed down treasure from my hubby's side of the family. It originally came with a lid but I chucked that awhile ago, when I figured out that this was the perfect umbrella holder. This project has been sitting in our garage just waiting for a coat of paint so it could be brought back into our sunroom and loved all over again. Projects like these are so simple and quick, I wonder why it takes me so long to do them!

Golden Umbrella Holder - Quick spray paint DIY - LeroyLime

Our sunroom has cheerful pops of turquoise, yellow and gold. What better color to paint something that will hold umbrellas for dreary rainy days than gold?! I flipped my pot over and sprayed in even light strokes, making sure to not keep my hand in one place for too long, to stay away from drips. After it dried in the sun, I flipped the pot upright and gave the top lip a quick spray. With just a few minutes of spraying and a few hours of drying time, this pot has a new cheerful spot in a corner of our sunroom and I think she looks pretty happy doing her job!

Golden Umbrella Holder - Quick spray paint DIY - LeroyLime

11.30.2015

Golden Handprints


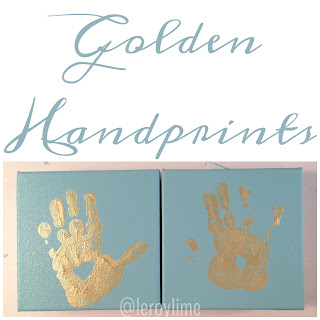
Golden Handprints - Kid Craft - LeroyLime


Better late than never is the motto in our busy house with four kiddos running around. I've had these canvases for over a year now so instead of one year old hand prints, we now have two year old hand prints. Which may be easier to accomplish since you can explain to a two year old how to hold out their hands.

Golden Handprints - Kid Craft - LeroyLime

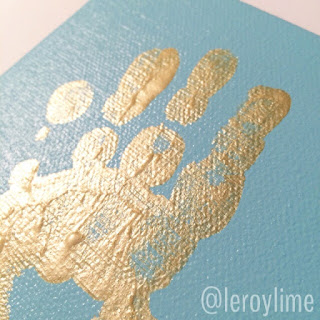
I started off putting tacks under the back side of the canvases, this way, you can paint the sides without sticking to the surface underneath. A paper plate for easy clean up and it makes a great spot to squeeze your paint. I painted two coats of Martha Stewart Surf in Satin onto the canvases with a foam brush. Then waited a day before pulling out the gold.

Golden Handprints - Kid Craft - LeroyLime

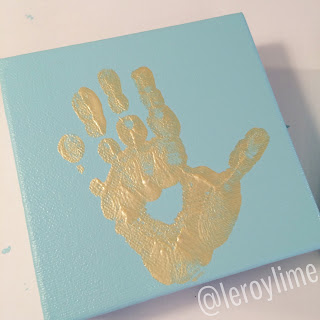
I started by letting my two year old rub her hand around in the gold (Martha Stewart Metallic Green Gold) paint and then flipped it over to paint the missing spots and take off the excess paint, so it wouldn't smear, with a clean foam brush.

 Golden Handprints - Kid Craft - LeroyLime

Talking her through the steps and showing her with my hand what she needed to do, I helped push down on the back of her hand gently and then helped her pull it off of the canvas. We washed in between hand prints to keep the mess at bay. I think they turned out great and I'm glad we did both of them so we can remember her sweet little handprints for years to come! 

Golden Handprints - Kid Craft - LeroyLime

The gold was a fun touch and would make great gifts for family members with the holidays coming up. If you need to make more than one, trim up a piece of watercolor paper and you've got the perfect gift for Grandparents!

Golden Handprints - Kid Craft - LeroyLime


10.19.2015

Mood Board Monday - Green/Gold

I love color but recently I've taken to adding whites into our home space. Whites are easy, they brighten a room. Whites add texture and timeless elegance. That's not to say I still don't have pops of color around the house, I do. I believe color is the easiest way to change the look and feel of a room, without much fuss.

Taking that in mind, I've created this story board which showcases how you can easily bring in a pop of color to a neutral zone. I fell in love with this green chair over at Chairish and I worked this mood board around that piece. Looking for a fun statement chair of your own? You can browse through the entire collection of vintage accent chairs here.

I love raw old wooden furniture, they are not only durable in moves but if they get dinged up, it just adds more character to each piece.

Adding small golden touches also adds warmth and glam to any room and if you can't find gold pieces to work with you can always spray paint them!

Don't forget a cozy throw and textured throw pillows. 
Be brave, be bold, add color!

Mood board Monday Green Gold


10.12.2015

Buckets of GOLD

I was out looking for terracotta pots to put our fall mums
in and instead of spending more than I wanted to on pots, I
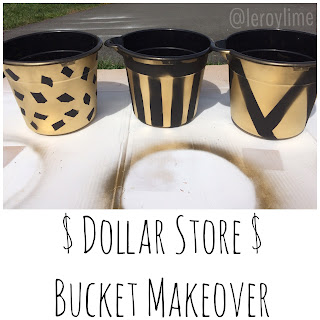
grabbed three black buckets from the dollar store. 

Dollar Store Bucket Makeover GOLD


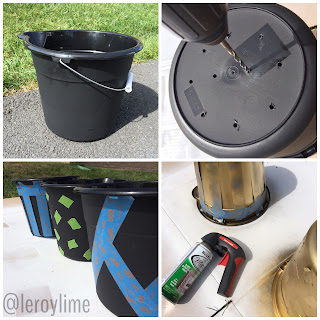
First the handles were popped off, a few holes drilled in the
bottoms for drainage and then a quick tape job before
hitting them with a coat of GOLD spray paint. 

Buckets of Gold

I added pea gravel in the bottom before nesting the 
white mums & grass in the three pots. I thought
they turned out cute for a quicky project!

Fall Porch Decor

and the front porch fall decor for this year is finally
complete...my 10 min wreath for under $10 will
be in another post, keep your eyes out for it!

You can view my other DIY projects here:

4.10.2015

Washi Tape Outlet Cover

So with my new desk top outlet plug, comes a shiny 
white boring outlet cover. What better way to fancy
it up in a craft room than with Washi Tape!
Bring out the options...

Washi Tape Outlet Cover

Washi Tape Outlet Cover

and with no sticky residue, I can change it up
anytime my crafty heart desires, in a washi flash!

11.06.2014

DIY Desk Makeover

This fugly desk was left in a closet in the home we
moved into this summer and I almost chucked it to
the trash bin until I decided to redo it for my daughter.

DIY Desk Makeover - Before & After - LeroyLime

Before - Black, Boring, Blah...

DIY Desk Makeover - Before & After - LeroyLime

I started by taking everything apart and
poked the screws into a piece of cardboard, partially
so I wouldn't lose them and also for ease of painting.

DIY Desk Makeover - Before & After - LeroyLime

All the sections are lifted off the ground with a few
pieces of scrap wood...although I got smart the next
day and put them up on saw horses...much better!

DIY Desk Makeover - Before & After - LeroyLime

I only used two coats of chalk paint and then with rags
sloppily applied the wax. Next time I'll get the right 
brush but this time, it worked just fine.

DIY Desk Makeover - Before & After - LeroyLime

A few coats of gold spray paint for the legs
and hardware...I think the gold looks a bit more fancy
instead of the drab silver

DIY Desk Makeover - Before & After - LeroyLime

I looked through my hubbies tool box for some sand
paper and found one of these round boys...roughed up
the corners, edges and a bit off the tops

DIY Desk Makeover - Before & After - LeroyLime

before and after shot of the legs
and hardware...I almost couldn't wait 
for it to dry before putting it back together
and I'm in LOVE with the after!

DIY Desk Makeover - Before & After - LeroyLime

Here's a shot of her new creative corner, 
which she exclaims that she "LOVES"!
The perfect spot for a pre teen to doodle, 
do homework or write letters to her friends.

DIY Desk Makeover - Before & After - LeroyLime

10.21.2014

Glamorous Gold

Remember this Trashy Treasure, I vamped up HERE back in 2012?
I found a new spot for this beauty above the doorway in our Sunroom
but orange just wasn't going to cut it with the turquoise and yellow decor.
Soooo, out came the bottle of gold spray paint, again...haha. Hope
you're not getting sick of the color yet?! 


Before and After


Do you have any favorite colors of spray paint
you like to use on your DIY projects?
I think I just might venture out on the next!

~~~~~~~~~~~~~~~~

linked up to Monday Funday
come check out all the fun projects!

10.04.2014

DIY - Just Spray Paint It

Paint it....black GOLD!!!

If you happened upon my sunroom wall post
then you know I went a little crazy with the spray paint.
Step away from the can...haha

The reason the wall took me all day,
was because I tweaked a few things here and there
as I was hanging and just so happened to have one
can of spray paint in the house... Thanks to an
impulsive buy at the craft store and because I
give away all of our paint before we moved
this past summer, boo...

'Stuff'

The birdcage was fine but looked a little dull, so it
got a new facelift and now sits center stage ready
to clip some Instagram photos to it. Orange wasn't
happening in the room but I love the frame, so of 
course...gold but I'll probably end of repainting it 
black. I even got down and dirty with the screws
for the birdcage since they are visible. I think I
might be painting a few of my hubby's tools next!

'LOVE'

This little nugget was tucked away for a rainy day,
with plans to make a Shhh, don't ring, sign...but as
you can see, nada wholada going on with it. It was
however the perfect size and color for 'the wall', so
I dusted off the Cricut and made a very sketchy
stencil. I taped one letter outline down at a time,
using a bit of snail adhesive for the inside little bits
and sprayed. The paint dried fast, so I was able
to move onto the additional letters quickly. By the 
time I got to the 'e', I was pretty darn proud of
myself and will be trying my hand at more of this
in the future but maybe with proper tools.


3.04.2013

Vintage Horse Themed Birthday Party


I still can't believe my first born babe is now 8! 
She's infatuated with anything that has to do with horses, so after she helped me pick out the color scheme, I got to work on the invites and everything else fell into place. 

A simple invite tied with thick rope twine. I attached
our address label to the backs to let the party girls know where the
sleepover was being held.
The Birthday Girl posing in her PINK cowgirl hat.

I wrapped the two wine pictures we had hanging above the sidebar
in the kitchen to make for a rustic backdrop and to help the color
scheme flow. 
close up of the party invitations
cupcakes for her school classroom

The party girls enjoyed painting their own shirts, cowgirl style...and then a simple peel and stick horse themed craft of bookmarks and a foam boot before pizza dinner, cake and ice cream.


Then popcorn, movies and sleeping bags in the living room and waking up to chocolate chip pancakes for breakfast, a great party indeed!
Pink streamers and a few balloons made for an inexpensive but
impressive backdrop behind the kitchen table.

A roll of wrapping paper was the perfect table runner with stamped
horseshoes, punched out with pink hearts.

And treat bag thank you's for the party girls, some rope Twizzlers
with a message from the Birthday Girl.

"Thanks for coming to my party, I hope you had a ropin' good time"

 What's your favorite party theme?? 
I hope you enjoyed this one as much as I enjoyed putting it all together!