Showing posts with label Paint. Show all posts

9.20.2018

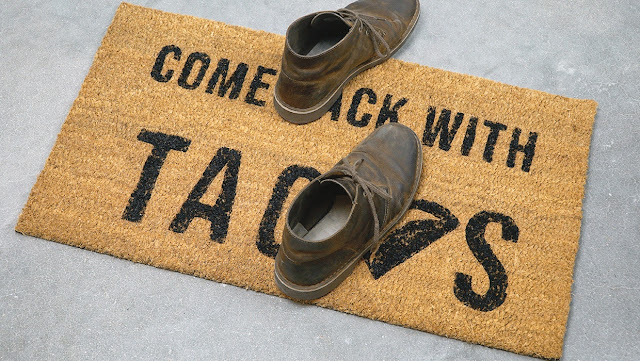
DIY Your Own Doormat With These 11 Free Printables

When you invite somebody over to your house the first thing they usually see is your doormat. It’s the welcoming sign to anyone dropping off packages or the neighbor who stops by to borrow some sugar. That’s why I’ll never understand why so many doormats are, well, boring! 

Stores sell the same old doormats so it’s hard to find one that truly reflects your personality. Lucky for you, it’s not difficult to make one yourself! It’s a great opportunity to show off your personality and reflect your personal style. 

DIY your own Doormat using these 11 FREE Printable Stencils

Wondering where to begin? This tutorial from Simply Self Storage is a step-by-step guide to making your own doormat. It includes detailed instructions with visuals, as well as my favorite part: 11 printables to use as stencils. There are so many options to choose from, from the basic “Live Laugh Love,” to the more playful “The Password is Guacamole.” 

Once you choose your stencil and gather all of your materials you will need to cut out the stencil. Now, this can be tricky. Those not experienced with an exacto knife might want to pick the larger, blockier designs first. 

When cutting, you’ll want to cut through the stencil AND the tape, but avoid cutting through your mat. This isn’t too difficult but does take some finesse. The straight lines will be easier to cut out than cursive designs, so plan accordingly. 

Below, I’ve included a list of materials and basic instructions for making your own DIY doormat. Follow these steps and soon you’ll your very own custom piece of outdoor art. Happy creating! 

DIY your own Doormat using these 11 FREE Printable Stencils

Materials You Will Need: 
Blank coir mat (standard outdoor mat) 
Outdoor acrylic paint 
Foam paint brushes 
Exacto knife 
Cardstock 
Painter’s Tape 
Pins 
Printer 
And a downloaded stencil! 

1. Choose Your Design and Print it Out

DIY your own Doormat using these 11 FREE Printable Stencils

2. Tape Your Mat Securely

DIY your own Doormat using these 11 FREE Printable Stencils

3. Arrange the Stencil on Your Mat

DIY your own Doormat using these 11 FREE Printable Stencils

4. CAREFULLY Cut Out Your Design

DIY your own Doormat using these 11 FREE Printable Stencils

5. Paint Several Coats

DIY your own Doormat using these 11 FREE Printable Stencils

DIY your own Doormat using these 11 FREE Printable Stencils

6. Let Dry and Reveal Your Design

DIY your own Doormat using these 11 FREE Printable Stencils

7. Enjoy Your Doormat!

DIY your own Doormat using these 11 FREE Printable Stencils

6.09.2016

Chalk Painted Octopus

Who doesn't love a little octopus? I picked up this wooden guy at Home Goods awhile back when I was starting to pull things together for my kiddos shared bathroom and hid it away for a rainy day. 

Chalk Painted Octopus - easy redo - LeroyLime the Blog

Once I painted their bathroom, the current color of Guy, the octopus, wasn't what I wanted (I had always planned to paint it anyway), so I quickly slapped a coat of WHITE chalk paint on it...

Chalk Painted Octopus - easy redo - LeroyLime the Blog


and then another. After it was fully dry, I quickly sanded down the edges with an electric sander. No wax or poly was used on guy, so this project was quickly finished and hung in their bathroom. Isn't he cute?! So glad the warm weather is back, it means paint dries faster!

Chalk Painted Octopus - easy redo - LeroyLime the Blog


2.22.2016

Tiny Chair Makeover

I've had these tiny metal chairs, from IKEA, for a few years now and in their current home on the bookshelf, I noticed that they didn't stand out since they blended in with their background. 
A quick coat of white spray paint and a little roughening up with a sanding block and these tiny chairs have embraced their easy makeover. 


If you have items in your home that just don't seem to stand out or you wish were a different color, don't get rid of them, give them a tiny makeover first and see if you fall in love with them all over again!


2.18.2016

Guest Bathroom Fix

I've wanted to paint our guest bathroom for quite sometime and with the flock of guests coming to visit in 2016, I took a couple of hours and finally tackled it! 

Guest Bathroom Painted Stripe - LeroyLime

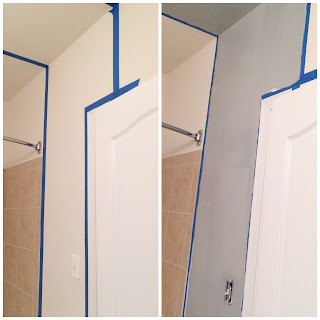
The bathroom is a bit small which is why I chose to paint one single stripe instead of the entire bathroom. Since this room is in the basement, there are no windows which means, no natural light. 
I didn't go the typical horizontal stripe route but instead brought the stripe across the entire bathroom, and up onto the ceiling, like a rainbow. 

Guest Bathroom Painted Stripe - LeroyLime

The taping was done quickly and I've a bit of practice on painting walls with all of our moving around...so I ran a quick light coat of the original builders paint color along the inside of the tape seam, where the stripe would go. After letting that dry completely, I pulled out my roller and got to work. I used two coats because I liked how it looked but probably could've gotten away with just one.

Guest Bathroom Painted Stripe - LeroyLime

I didn't fuss much around the toilet, just took off the top lid and covered the tank with a trash bag. Also for ease of repainting or if I decided I just didn't like the look after I was done...while taping, I kept a border around the trim, which also means I didn't have any paint running onto my trim or crazy touch ups next to the tile and I love the look of it!

Guest Bathroom Painted Stripe - LeroyLime

I ran the vent cover through the dishwasher, hung the curtain back up and re accessorized. 
The little shelving rack above the toilet I picked up from World Market and it's the perfect place to hold washcloths within reach and also bottles of whatever guests bring with them. The counter space is a bit slim with just one sink, so I wanted to keep in mind that my guests would need somewhere to put their items.

Guest Bathroom Painted Stripe - LeroyLime

 New towels are folded neatly under the sink along with a large apothecary jar filled with all sorts of hotel shampoos and such. I hope our guests will feel at home in this small but very useful space!

Paint Color : Gray Frost D57-3

7.30.2015

Playroom Makeover


Playroom Makeover with Leftover Paint

Our basement playroom was in need of a little
pizzazz, so out came the painters tape and all the 
leftover paint that has been used around our home.

Here is the wall...

"Before"

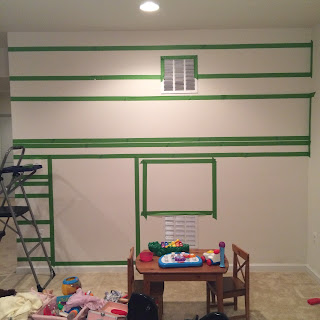
...and here is what I taped out. I used a large level to
add marks on the wall and then taped along the wall,
matching up to the pencil marks (making sure I would 
be covering them with paint).

I knew I wanted the kitchen in the right corner, so
decided to leave that blank...

Playroom Makeover with Leftover Paint

A chalkboard spot for drawing on the left, I painted
over every section twice before peeling off the tape.

The yellow spot is a little too pale for my taste but 
it's where the magnetic board is hung with the kids
fridge magnets below in a basket. 

So a few hours of taping one day, painting and 
reorganizing the toys the second day and now 
there is a little more cheer in our dark basement!

Playroom Makeover with Leftover Paint
"After"

5.27.2015

DIY Magnetic Chalkboard


DIY Magnetic Chalkboard


If you're not a fan of a messy fridge and you have
a blank wall just begging to be beautified, a DIY 
magnetic chalkboard just might be in order.

My dear hubs doesn't like clutter (which is why
we are a perfect match) and so, to drive this DIY to
the finish line...I started to "clutter" up the space where
I wanted the magnetic chalkboard to go, by taping
the kids artwork and school papers to the wall with
Washi Tape...it worked!

DIY Magnetic Chalkboard


Shopping List:

2-1X4 Pine Fence Boards
3X2' Sheet of 1/4" thick Aluminum
Black Chalkboard Paint
(Leftover) White Paint

DIY Magnetic Chalkboard

He started by cutting the fence boards down to size 
and adding angles for the corners. Clamped it all 
together and then painted the metal board with several
layers of Chalkboard Paint. The frame was painted 
white with some leftover paint. The magnetic
chalkboard is held behind the frame with metal 
brackets on  each corner and he also taped around the 
board, so the back would be smooth. Heavy duty metal
hangers hang this heavy duty project straight into
the studs. We had the metal filing baskets and added 
them to the wall for extra school papers.

The frame size is 42-3/4" X 31" but you can
customize it to fit your space.

The perfect way to organize all the papers and crap 
from collecting on the counter, yipee!

DIY Magnetic Chalkboard

5.10.2015

Furniture Makeover - Summer Porch Yellow


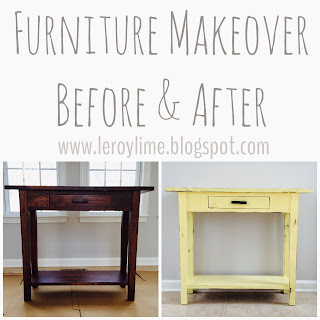
Furniture Makeover YELLOW Before & After


Warm weather means that I can paint again, yippee!
I've been wanting to give this piece of furniture
a facelift since we moved to VA last year. 
A bit banged up and scratched with moving
but it's still a great piece that sits nicely on 
our stairway landing.

Our walls are grey (darker in the main part of the
house, the photos were taken in our sunroom) and
the yellow pop on the stairway will be a nice addition
to our family sunflower canvas.

I found this scrumptious yellow at AC Moore, it's 
called Summer Porch, by FolkArt Home Decor Chalk.
I used about half of the bottle with two coats for this
project. I'm not the best painter but I like to tackle
projects and get them done and am very happy
with the end result of this one!

Furniture Makeover YELLOW Before & After

Two coats with two different brushes...
I waited a day in between coats since I painted
during nap time but the paint was very quick to dry.

Furniture Makeover YELLOW Before & After

A different day, I pulled the sander out and quickly
edged up my piece, letting the brown pop through
in various places.

Furniture Makeover YELLOW Before & After

Next the Polycrylic, this was very easy to apply
but you need to make sure you don't put too much
on your brush or you'll get unwanted drips
(which can be sanded off, thankfully, oops!)

Furniture Makeover YELLOW Before & After

Two coats of Poly, in two days...again at naptime.

Black Chalkboard SprayPaint

I wanted to paint the drawer pull black but only
had chalkboard paint on hand...I used two nails 
poked through a piece of cardboard to hold my drawer
pull away from any surfaces. The bottom two
photos are what it looked like before. The top pic 
is right after I sprayed, still wet...

Furniture Makeover YELLOW Before & After

Next the drawer, I didn't paint the bottom, since I
knew I was going to line it with something. Found 
this super cute, inexpensive grey and white chevron
drawer liner at Target. 

I unrolled it and folded it over in the corner to create
a cutting crease, pulled it out and slid my scissors
up the folded line. Before taking off the backing,
I made sure it fit inside. Just two small trims, peeled
off the back and stuck it inside. 

Furniture Makeover YELLOW Before & After - Chevron

I'm in love with my little yellow table, 
isn't it sweet?...

Furniture Makeover YELLOW Before & After


2.13.2015

DIY Frame and Valentine Mantle Decor

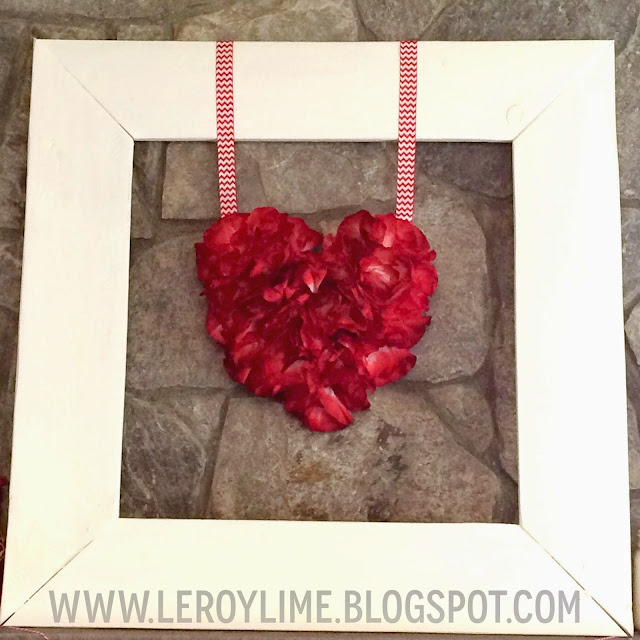
I asked my dear hubby to whip up another project
that's been floating around in my head. We needed 
something larger for our mantle that could be used 
to decorate with. After looking for frames at Michael's 
and a few other stores but not wanting to swallow 
the $100 or more price tag for the size we needed...

DIY Frame & Valentine Mantle Decor

Two pieces of fence boards from Home Depot were
snatched up instead and this is what the hubs made 
that I painted with Americana Decor Chalk Paint.

DIY Frame & Valentine Mantle Decor

 Just a simple square but it adds a bit of height
and will be so fun to switch up for all the different 
holidays this year, can't wait to continue
the crafting projects!! 

DIY Frame & Valentine Mantle Decor

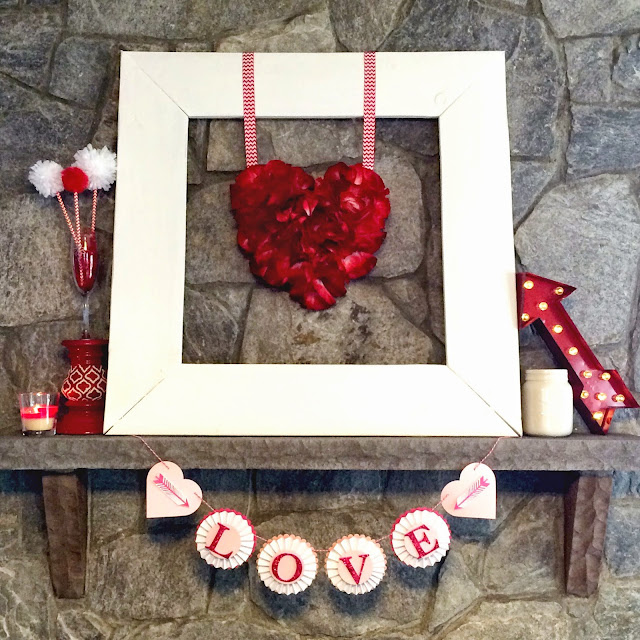
Here's our mantle this year for Valentine's Day.
Share the love and link your Valentine projects
or decor below in the comments!

1.24.2015

Valentine Heart Banner - Kid Craft

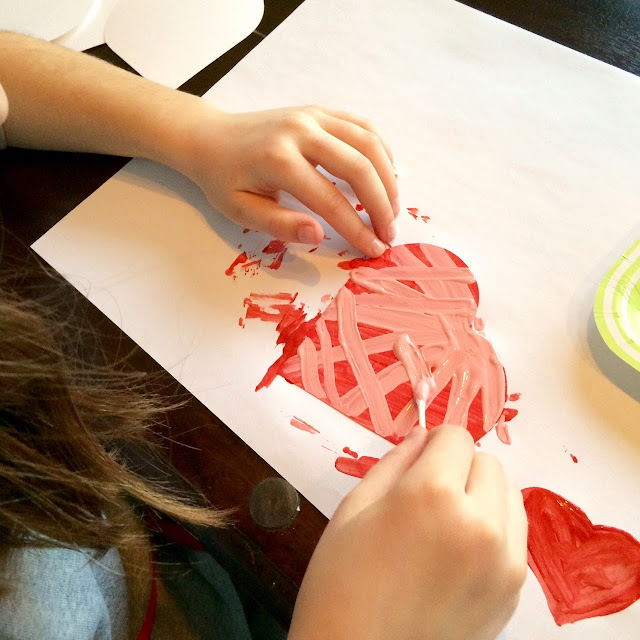
Got all four of my chickens involved in decorating this
year for February. I die cut out these hearts in white cardstock,
and let them go to town with craft paint and Q-Tips. 

Valentine Kid Craft Heart Banner

Love those sweet little hands...

Valentine Kid Craft Heart Banner

Valentine Kid Craft Heart Banner

After the hearts were dry, a simple hole punch for
ease of threading bakers twine (or you can use yarn)
and then die cut letters to spell your desired phrase.
You can also use stickers or draw directly onto 
the dry painted hearts with a sharpie marker, 
if you don't have die cuts for lettering.

Valentine Kid Craft Heart Banner

Happy Decorating!!

1.23.2015

DIY Valentine Decor Amore

After taking down our Christmas decor, the house
felt a little barren and although I love a clean and
uncluttered house, I also love holidays!

DIY Valentine Decor AMORE

We are lacking in the Valentine decor
department, so when I spotted these cool
metal letters at Michael's...I put them back.
Really. I did. I put them back and walked away.
Mainly because there wasn't an "o"...and then
I walked past the Valentine row and spotted 
the perfect "o", the red metal cookie cutter
heart. I quickly ran back and snatched up
my letters and then headed to Home Depot.
Happy girl, happy girl!!!

DIY Valentine Decor AMORE

Picked up 3 fence panels since another project
is in my head, in the works.
Just a two foot section was cut for this craft.
It needed to stand up, so a piece of scrap wood, 
an angled cut & some screws fixed that.

Already had the pink Americana Decor chalk
paint on hand, so I quickly got to work painting.

DIY Valentine Decor AMORE

Of course a coffee break between the two coats.
Finished up the edges with a bit of white chalk paint.

DIY Valentine Decor AMORE

I used the two pots of paint to balance the board on while
spacing the letters and hot gluing. If you wait a couple of 
seconds, the glue is the perfect temperature to smear into
the cracks with your finger without losing layers of skin.

A quick cut with an exacto knife to remove any visible glue 
that seeped out from the tops of the letters and voila!

That's Amore!

DIY Valentine Decor AMORE


1.16.2015

Easy DIY Painted Stripe


Easy DIY Painted Stripe - Furniture Makeover


Checking 'to do' items off our list, one of which
was touching up all the paint in our home. With little
fingers and tiny thrown toys at times, our walls had
a few dings that needed repaired and touched up. 

This dresser had one of those beloved dings on the 
top drawer and it has bothered me for over a year.
I already had the blue paint out to touch up the 
large horizontal stripe that goes around our sons room
and decided to 'fix' up their plain jane white dresser
from IKEA while I was at it.

Easy DIY Painted Stripe - Furniture Makeover

I eyeballed my first tape line, then grabbed a ruler 
for the second to make sure I was even from each end.
A little hole filler - no sanding on anything - a foam
brush and paint. 

Easy DIY Painted Stripe - Furniture Makeover

First coat...I waited until completely dry. I set a mini
fan in front of the dresser to help quicken my drying
time, since my todo list seemed miles long, isn't it 
always, haha!

Easy DIY Painted Stripe - Furniture Makeover

Second Coat

Easy DIY Painted Stripe - Furniture Makeover


and Third Coat...you can still see a bit of the ding
but it's not as noticeable now that the dresser is painted.
I wanted to make sure the paint would hold up to my boys,
hence the third coat.

Easy DIY Painted Stripe - Furniture Makeover

 Peeled off the tape and am in LOVE with the new look!
 Have you painted anything in the new year?