Showing posts with label Red. Show all posts

2.12.2015

Coffee Filter Flowers

With the leftover coffee filters from my 3-D Heart
I whipped up these super simple and fun coffee filter flowers.

Coffee Filter Flowers Valentine Decor

I used the same technique as before, essentially folding each
filter in half and then pinching to make a stem in the center. 
I stuck the first flower inside the top of a paper straw and then
added two more filters for a fuller floral look.

Coffee Filter Flowers Valentine Decor

Careful with that hot glue gun on this project,
it just might bite a little!
A scrap of ribbon glued on the bottom of the flower
 helps to hide any odd layers as well.

Coffee Filter Flowers Valentine Decor

These would make a fun gift for your Valentine!

3-D Coffee Filter Heart

 I needed to make something large for an open frame 
the hubs built for me and decided to try my hand at
tackling coffee filters. I  used only one stack from my 
coffee filter bag for this project with a few filters left over.

3-D Coffee Filter Heart Valentine Decor

A bottle of red reinker dye (that I have for my stamp pads)
was used along the edges. I wanted the color to flow down 
the filters so pulled out a glass of water and a straw.
I soaked the entire stack of filters until I was happy
with the color saturation and then let the stack dry overnight.
Make sure you do this on a plate, paper works fine
and you can toss in the trash when you are done.

3-D Coffee Filter Heart Valentine Decor

I was going to cut out a large cardboard heart but
saw this stiff felt one at Michael's and it was 1/2 off
so I used it as my base. Once the coffee filters were 
completely dry, I started forming them into flower 
shapes. Just fold in half and then twist the bottom 
into a little stem. You can fluff the tops if needed.

3-D Coffee Filter Heart Valentine Decor

 Once you get some flowers made up, whip out your
hot glue gun and work with one flower at a time
gluing them onto your form. Make sure you squish
each flower down a bit (without crushing) till the
glue can catch or harden. 

3-D Coffee Filter Heart Valentine Decor

After covering my heart, I went back and filled in
the spots that I thought needed a bit more fluff.
Hope you'll try your hand at a coffee filter project
the possibilities are endless!

1.24.2015

Valentine Heart Banner - Kid Craft

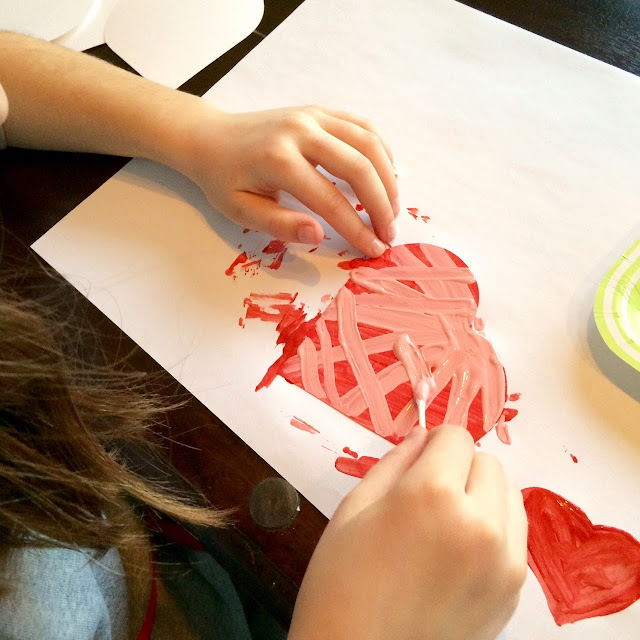
Got all four of my chickens involved in decorating this
year for February. I die cut out these hearts in white cardstock,
and let them go to town with craft paint and Q-Tips. 

Valentine Kid Craft Heart Banner

Love those sweet little hands...

Valentine Kid Craft Heart Banner

Valentine Kid Craft Heart Banner

After the hearts were dry, a simple hole punch for
ease of threading bakers twine (or you can use yarn)
and then die cut letters to spell your desired phrase.
You can also use stickers or draw directly onto 
the dry painted hearts with a sharpie marker, 
if you don't have die cuts for lettering.

Valentine Kid Craft Heart Banner

Happy Decorating!!

1.23.2015

DIY Valentine Decor Amore

After taking down our Christmas decor, the house
felt a little barren and although I love a clean and
uncluttered house, I also love holidays!

DIY Valentine Decor AMORE

We are lacking in the Valentine decor
department, so when I spotted these cool
metal letters at Michael's...I put them back.
Really. I did. I put them back and walked away.
Mainly because there wasn't an "o"...and then
I walked past the Valentine row and spotted 
the perfect "o", the red metal cookie cutter
heart. I quickly ran back and snatched up
my letters and then headed to Home Depot.
Happy girl, happy girl!!!

DIY Valentine Decor AMORE

Picked up 3 fence panels since another project
is in my head, in the works.
Just a two foot section was cut for this craft.
It needed to stand up, so a piece of scrap wood, 
an angled cut & some screws fixed that.

Already had the pink Americana Decor chalk
paint on hand, so I quickly got to work painting.

DIY Valentine Decor AMORE

Of course a coffee break between the two coats.
Finished up the edges with a bit of white chalk paint.

DIY Valentine Decor AMORE

I used the two pots of paint to balance the board on while
spacing the letters and hot gluing. If you wait a couple of 
seconds, the glue is the perfect temperature to smear into
the cracks with your finger without losing layers of skin.

A quick cut with an exacto knife to remove any visible glue 
that seeped out from the tops of the letters and voila!

That's Amore!

DIY Valentine Decor AMORE