10.21.2015

Elmo Rainbow Party (on the cheap)

I'm not a huge character fan *insert gasp here...but you can't help but fall in love with Elmo
and that's exactly what every one of my four kiddos has done!


I was standing in the party aisle at Wally World trying to come up with something crafty and found these fun chevron rainbow colored plates, perfect for a rainbow themed little girl's Birthday and of course with the color red, I was able to fit Elmo into the theme!


 I snatched up the last of the mini paper rosettes at .70 cents per pack of two, a total steal in my book and promptly went home to punch out elmo features to make his face. I used two different sized circle punches for his eyes, an oval for the nose and a large circle that I cut with my Big Shot and xl Sizzix circle die and then trimmed in half for the mouth. Because the rosettes have gaps, hot glue was the best way to adhere the pieces onto the rosettes.

Elmo Rainbow Party Ideas (on the cheap)


 Streamers are a fun way to add color inexpensively to any space, so I hung mine in a rainbow pattern, first covering a piece of artwork with a red vinyl table cloth so it didn't show through.

Elmo Rainbow Party Ideas (on the cheap)

 I can't take credit for the cupcakes...they were already frosted in primary colors and the elmo cupcake toppers were also found at Wally World in the party aisle. 

Elmo Rainbow Party Ideas (on the cheap)

Elmo Rainbow Party Ideas (on the cheap)

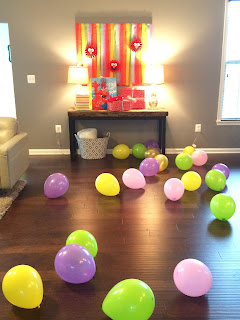
Here are a few more shots of decorations, our 2 year old was a very happy camper and LOVED all the Elmo's. The Happy Birthday Rainbow banner is one I now have listed in my LeroyLime Etsy shop, you can view that HERE. The two rainbow colored paper balls were also in the party aisle at Wally World. Wally World for the win!! And a party wouldn't be complete without gobs of balloons!

Elmo Rainbow Party Ideas (on the cheap)

Elmo Rainbow Party Ideas (on the cheap)

Elmo Rainbow Party Ideas (on the cheap)

Elmo Rainbow Party Ideas (on the cheap)


10.19.2015

Mood Board Monday - Green/Gold

I love color but recently I've taken to adding whites into our home space. Whites are easy, they brighten a room. Whites add texture and timeless elegance. That's not to say I still don't have pops of color around the house, I do. I believe color is the easiest way to change the look and feel of a room, without much fuss.

Taking that in mind, I've created this story board which showcases how you can easily bring in a pop of color to a neutral zone. I fell in love with this green chair over at Chairish and I worked this mood board around that piece. Looking for a fun statement chair of your own? You can browse through the entire collection of vintage accent chairs here.

I love raw old wooden furniture, they are not only durable in moves but if they get dinged up, it just adds more character to each piece.

Adding small golden touches also adds warmth and glam to any room and if you can't find gold pieces to work with you can always spray paint them!

Don't forget a cozy throw and textured throw pillows. 
Be brave, be bold, add color!

Mood board Monday Green Gold


Back to School Lunch Notes

Back to School Printable Lunch Notes

My kids have been back to school for almost 2 months now
and we are settled in our new 'normal' schedule with school,
 after school activities and such.  

With said schedule, it's easy to rush through the day
and lose track of connecting with your kids and letting
them know how much you love and adore them. 

Making sure your children are proud of who they
are, knowing they are loved, remembered
throughout the day and building up their confidence
is all very important. 

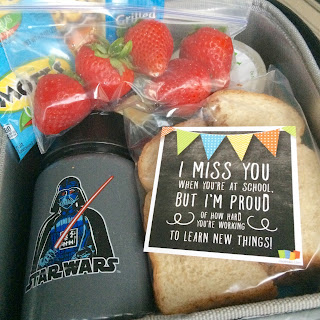
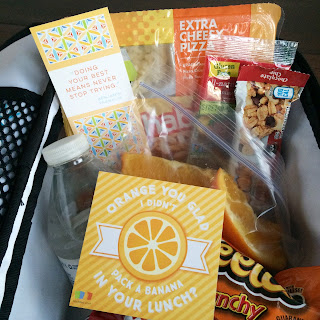
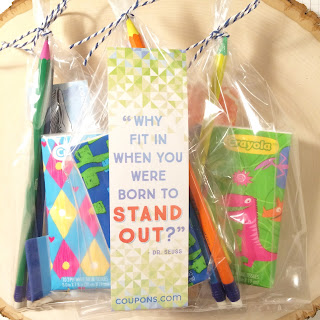
These little printable notes from Coupons.com
are perfect for tucking that little note of 
encouragement and love into their lunchboxes or 
backpacks for them to find when they are at school.

Back to School Printable Lunch Notes

My kids love getting the notes and bookmarks and 
always let me know when they've found one by 
saying "Thank you for the note, Mommy"! 

Warms my heart and then I'm remembered to take
the time out of my busy day to just stop, snuggle 
and enjoy that moment with my littles!

Head over to Coupons.com and print out your own
little love notes and bookmarks, you can thank me
later...I know your kiddos will!
Back to School Printable Lunch Notes

Back to School Printable Lunch Notes

Back to School Printable Lunch Notes

Back to School Printable Lunch Notes

Back to School Printable Lunch Notes

Back to School Printable Lunch Notes

Back to School Printable Lunch Notes

Back to School Printable Lunch Notes


~~~~~~~~~~~~~~~~~~~~~~~~~~~~~~~~

Financial compensation was not received for this post. 
A sample product was gifted from Coupons.com 
Opinions expressed here are my own.

10.15.2015

DIY 10 Min Wreath for under $10

The very last piece missing from our front porch fall decor
was a wreath for our front door. So I put this one together
for under $10 in just 10 minutes!

10 Minute Wreath for under $10 - LeroyLime

I had picked up a few of these grape vine bundles 
at AC Moore when they were on sale for $2.50
each and had one left. I used two of them on my
Tee Pee Trees and hung the other above the doorway.

10 Minute Wreath for under $10


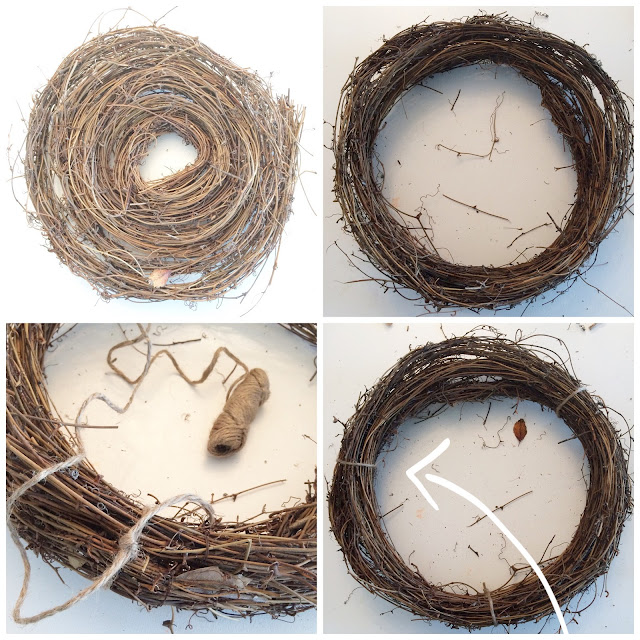
First I snipped off the tags and then loosely unwrapped
and rewrapped my vine in a simple circle. I used garden
rope twine to secure the end in place and then tied two more
sections of my wreath form to firm everything up.

10 Minute Wreath for under $10


The burlap ribbon, I purchased for $4.99 and a 40%
coupon and three leaf bundles came from the Dollar Tree.

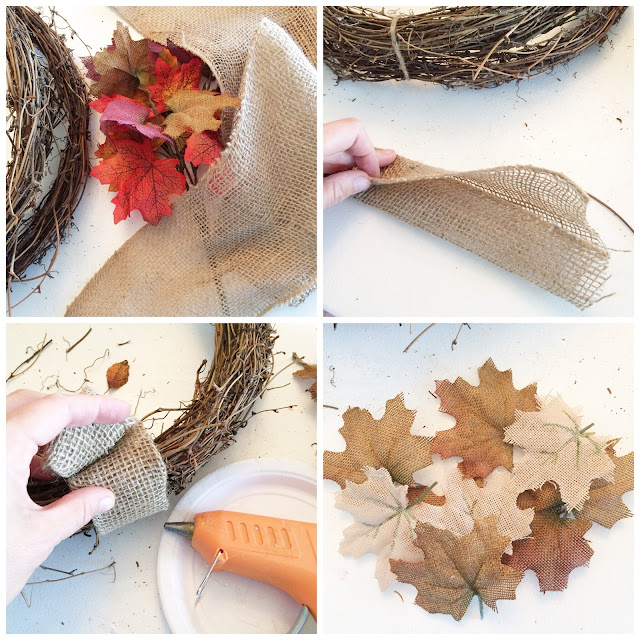
I snipped off three 12" sections of the burlap, triple
folded, tucking in my end on the back of the wreath and hot
glued it into place. I didn't even use an entire glue stick on this 
project! After covering up my garden twine with the burlap
pieces, I snipped off the leaves that I wanted to use
and saved the other ones for a future project.

10 Minute Wreath for under $10

 I placed my leaves along one side first and then with just a drop
of hot glue on each back, stuck them in place. I wanted to be able
to reuse the vines in the future, if I get tired of this wreath, so
didn't use as much glue as I normally would. 

10 Minute Wreath for under $10

 and Taadaa...a completed Natural Fall Wreath 
for under $10 in only 10 minutes!

10.14.2015

Airplane Party Decor

If you are looking for some fun airplane items for
your next Pinterest-worthy party, I've recently 
listed these items in the shop! 

The banner can be personalized with any name or
phrase and all items can be made in a variety of colors
to coordinate with your soaring event!

Click on each photo to take you directly to the listings
in my LeroyLime Etsy shop...and if there's anything 
you don't see, let me know and we can drum up
a one of a kind specialty party items just for you!

Airplane Party Thanks Gift Tags

Airplane Party Name Banner

Airplane Party Confetti

Airplane Party Gift Tags


10.12.2015

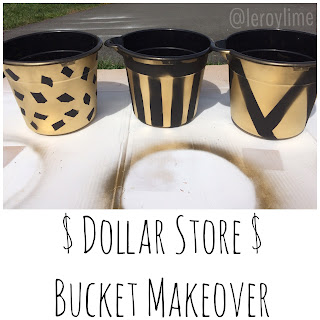
Buckets of GOLD

I was out looking for terracotta pots to put our fall mums
in and instead of spending more than I wanted to on pots, I
grabbed three black buckets from the dollar store. 

Dollar Store Bucket Makeover GOLD


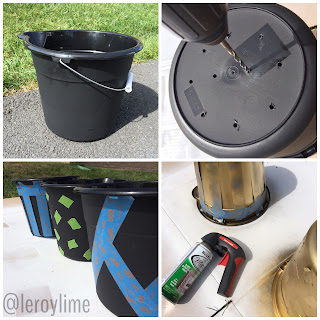
First the handles were popped off, a few holes drilled in the
bottoms for drainage and then a quick tape job before
hitting them with a coat of GOLD spray paint. 

Buckets of Gold

I added pea gravel in the bottom before nesting the 
white mums & grass in the three pots. I thought
they turned out cute for a quicky project!

Fall Porch Decor

and the front porch fall decor for this year is finally
complete...my 10 min wreath for under $10 will
be in another post, keep your eyes out for it!

You can view my other DIY projects here:

10.06.2015

DIY Wooden Pumpkins


Fall Porch Decor LeroyLime

Okay y'all, I've stepped out of my paper cut comfort zone, into the world of wood and scary saws...

and I am in LOVE!!

I picked up some small picket fence boards and snagged a few pots of 50 cent clearance paint from
Home Depot and got to work.

I knew I wanted to make two pumpkins, one big and one small, so I separated my pile of wood 
accordingly, grabbed a piece of scrap wood and screwed into each picket section from the back.
It'll shift on you, if you leave it as such, so grab a smaller piece of scrap and diagonally fix it to
your cross bars.

I took a pencil and rough sketched out a pumpkin on the backs, next time I'll put my sketch on the front since the cross bars were a bit in my way. Lesson learned and I wouldn't learn if I didn't try!

DIY Wooden Pumpkins

My work station all set up on our driveway, I'm sure my neighbors think I'm crazy! 

I clamped down one side of each piece and taking a jigsaw, cut off the extra pieces along my rough
sketch. I have to say it was quite satisfying with each section that dropped to the ground. 

DIY Wooden Pumpkins

I flipped the board over, re clamped and cut out the other side of my pumpkins. 

Next the sanding, over the entire fronts and sides...buzzzzzzzzz...I rounded the bottoms a bit more 
with the jigsaw, until I was happy with my pumpkins.

DIY Wooden Pumpkins

Couldn't pass up the steal on paint... I snagged 6 pots for 50 cents a piece...colors I know I'll use for
future projects and even it I don't, I didn't break the bank!

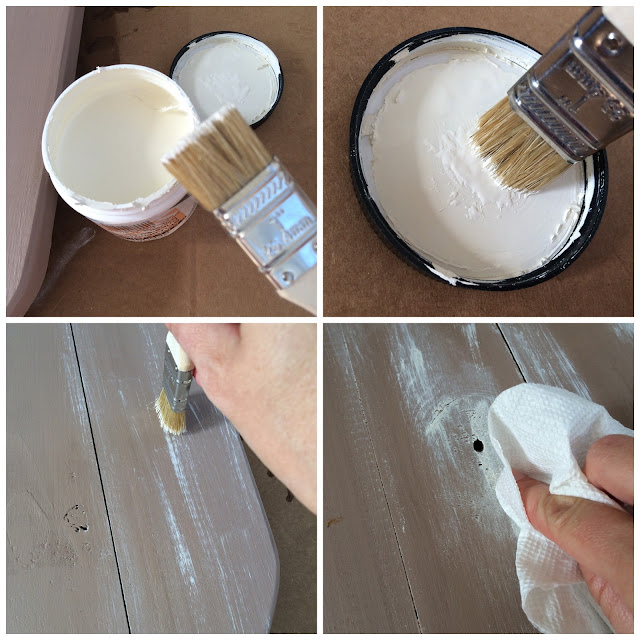
Not sure why in the bottom right photo the paint looks grey, it's a brown...

DIY Wooden Pumpkins

I cut the end off of a cheap brush to make it firmer and sort of tapped, dry brushed with that, finishing
up with a paper towel to blend. (Just on the brown pumpkin to give it more detail.)

DIY Wooden Pumpkins

A quick clear coat of poly and they are proudly displayed on our front porch. I'm just excited they
won't rot and I'll have to throw them away!

DIY Wooden Pumpkins

 If you have a pile of scrap wood lying around, give these a try, they sure were fun to make!

DIY Wooden Pumpkins

10.01.2015

Octobers

Octobers

Isn't that the truth? 
Happy October 1st Everyone!!