Showing posts with label Makeover. Show all posts

6.15.2016

Quick Bench Makeover

We've had this red bench for about 12 years. Picked it up from IKEA in Germany for our small hall entryway and it was the perfect fit. Each home we've moved into, the bench has found a useful spot, except our current home. I actually had it out in our garage sale and I'm surprised no one snatched it up. 

Quick Bench Makeover - Before & After - LeroyLime

The red has left our home for more soothing grey tones but the bench still had so much life left in it, I decided to try to paint it. Looked up a how-to on Pinterest and a few blogs and no luck, total Pinterest fail. After cleaning out a closet, I found a grey tablecloth that we had used as a curtain in our youngest nursery. 

I pulled out the staple gun and started stapling, starting from the center and working my way out. Once I had the long side stapled, the ends were a bit trickier. I've never recovered anything before but you've got to start somewhere.

Quick Bench Makeover - Before & After - LeroyLime

The fabric at the ends was too much to staple, so I pulled it towards the center, stapling as I smoothed out the wrinkles and ended up cutting out quite a bit of fabric before folding over the very top section and stapling underneath. Sort of looks like an elephant's trunk...

Quick Bench Makeover - Before & After - LeroyLime

and now I have the perfect bench for the sewing side of my craft table. When it's not being used, it tucks neatly underneath the desk.

Quick Bench Makeover - Before & After - LeroyLime

Quick Bench Makeover - Before & After - LeroyLime


4.06.2016

DIY Shabby Makeover

It's another easy paint project but one you don't want to miss!

DIY Shabby Makeover with Spray Paint : LeroyLime

 I've had this fleur de lis iron hook for several years now and when we gave our master bathroom a new lease on life with a new coat of paint, it just didn't stand out anymore. But not to worry, it didn't go in the giveaway bin, instead, I grabbed a can of white spray paint and gave it a squirt or two. After letting it dry overnight, I hit all the edges with a sanding block and it brought just enough charm out to make the extra step worth it!

DIY Shabby Makeover with Spray Paint : LeroyLime

and now we have a new shabby fleur de lis, along with the perfect spot to hang our robes!

4.04.2016

Bench Makeover

A bench built with love from my husbands late Grandfathers hands has always been a treasure to move with us and find the perfect location for a quiet time out spot for our little ones. All four have used it in it original condition but the lettering had faded and I thought a little freshening up was just what the DIY Dr. ordered.

Bench Makeover : Before & After - LeroyLime
 Before and After

I made sure to wipe down the bench with a damp cloth and let it air dry before opening my bottle of Waverly Chalk Paint in Agave. One coat with a foam brush and then a second coat before lightly distressing the edges and taking off any roughness with a sanding block. 

Bench Makeover : Before & After - LeroyLime

Satine can always be found close by and usually approves of all of my crazy projects! 

Bench Makeover : Before & After - LeroyLime

A quick layer of Minwax clear satin Polycrylic, you can always double up on Poly. Just make sure you put on thin layers because it dries quickly and will drip if you have too much on your brush.

Bench Makeover : Before & After - LeroyLime

I'm quite pleased with the finished bench,  it adds a nice cheerful pop of color to our sunroom and the kids use it not only for time outs but also to put on their shoes!

Bench Makeover : Before & After - LeroyLime

2.18.2016

Guest Bathroom Fix

I've wanted to paint our guest bathroom for quite sometime and with the flock of guests coming to visit in 2016, I took a couple of hours and finally tackled it! 

Guest Bathroom Painted Stripe - LeroyLime

The bathroom is a bit small which is why I chose to paint one single stripe instead of the entire bathroom. Since this room is in the basement, there are no windows which means, no natural light. 
I didn't go the typical horizontal stripe route but instead brought the stripe across the entire bathroom, and up onto the ceiling, like a rainbow. 

Guest Bathroom Painted Stripe - LeroyLime

The taping was done quickly and I've a bit of practice on painting walls with all of our moving around...so I ran a quick light coat of the original builders paint color along the inside of the tape seam, where the stripe would go. After letting that dry completely, I pulled out my roller and got to work. I used two coats because I liked how it looked but probably could've gotten away with just one.

Guest Bathroom Painted Stripe - LeroyLime

I didn't fuss much around the toilet, just took off the top lid and covered the tank with a trash bag. Also for ease of repainting or if I decided I just didn't like the look after I was done...while taping, I kept a border around the trim, which also means I didn't have any paint running onto my trim or crazy touch ups next to the tile and I love the look of it!

Guest Bathroom Painted Stripe - LeroyLime

I ran the vent cover through the dishwasher, hung the curtain back up and re accessorized. 
The little shelving rack above the toilet I picked up from World Market and it's the perfect place to hold washcloths within reach and also bottles of whatever guests bring with them. The counter space is a bit slim with just one sink, so I wanted to keep in mind that my guests would need somewhere to put their items.

Guest Bathroom Painted Stripe - LeroyLime

 New towels are folded neatly under the sink along with a large apothecary jar filled with all sorts of hotel shampoos and such. I hope our guests will feel at home in this small but very useful space!

Paint Color : Gray Frost D57-3

7.30.2015

Playroom Makeover


Playroom Makeover with Leftover Paint

Our basement playroom was in need of a little
pizzazz, so out came the painters tape and all the 
leftover paint that has been used around our home.

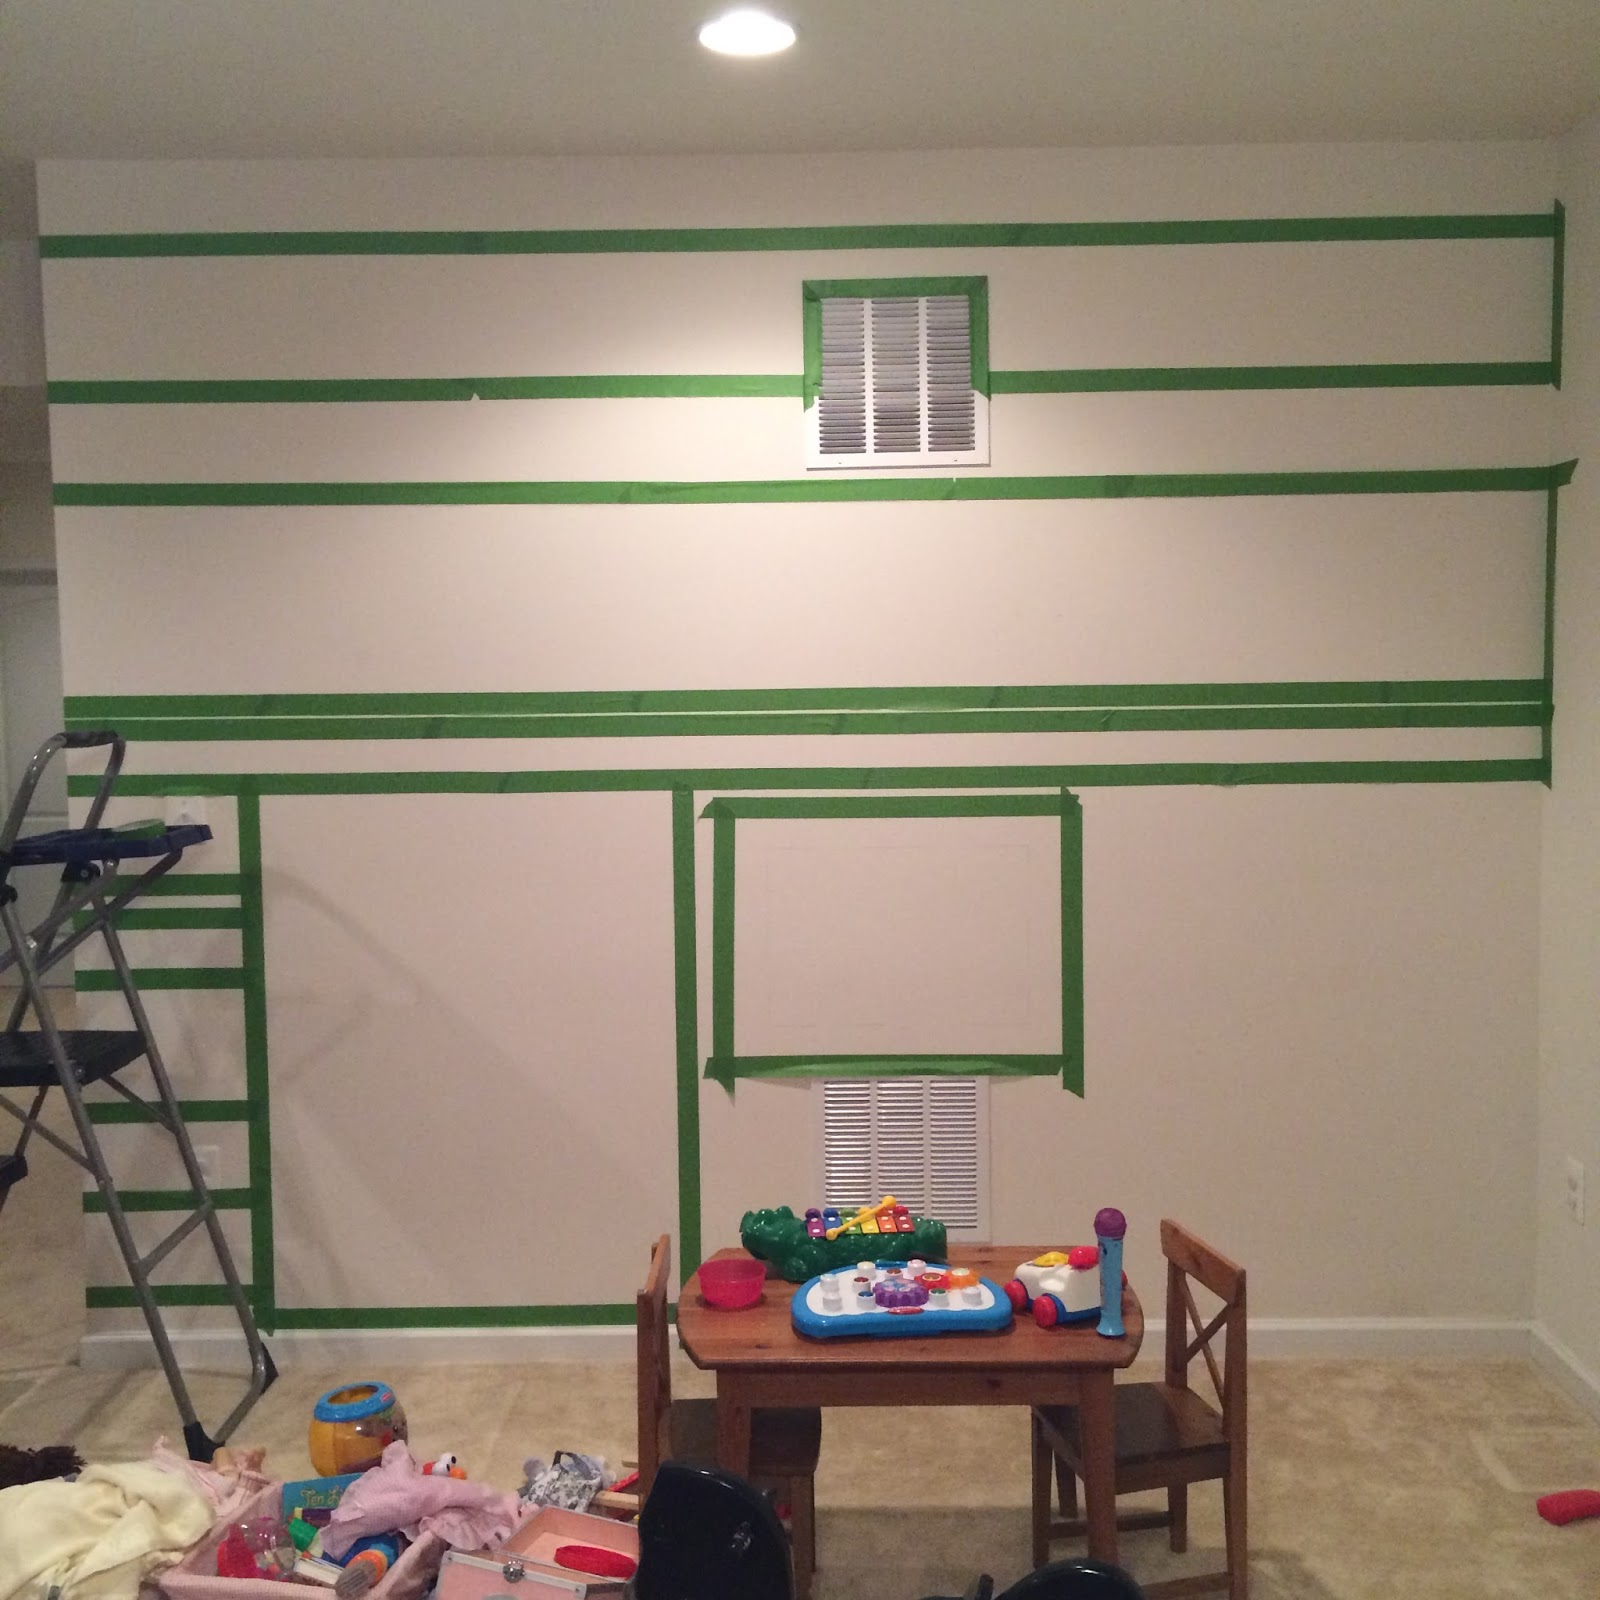
Here is the wall...

"Before"

...and here is what I taped out. I used a large level to
add marks on the wall and then taped along the wall,
matching up to the pencil marks (making sure I would 
be covering them with paint).

I knew I wanted the kitchen in the right corner, so
decided to leave that blank...

Playroom Makeover with Leftover Paint

A chalkboard spot for drawing on the left, I painted
over every section twice before peeling off the tape.

The yellow spot is a little too pale for my taste but 
it's where the magnetic board is hung with the kids
fridge magnets below in a basket. 

So a few hours of taping one day, painting and 
reorganizing the toys the second day and now 
there is a little more cheer in our dark basement!

Playroom Makeover with Leftover Paint
"After"

7.09.2015

Rocking Chair Makeover

I picked up this sweet little rocking chair for $6 at a
second hand store in North Dakota a few years ago and 
it finally got a much needed facelift with a bit of 
Americana Decor chalk paint.

Rocking Chair Makeover Before & After

I used a sanding block to smooth the rough edges,
cleaned off the chair with a damp paper towel and
let it air dry for a bit before painting.

Rocking Chair Makeover Before & After


Rocking Chair Makeover Before & After

I used Americana Decor Chalk paint, called Refreshing,
a beautiful and truly refreshing mint color.
I found the paint at Michael's (using a 40% off coupon)
and Home Depot also carries a few color choices.

Rocking Chair Makeover Before & After

The first coat was easy to apply...I'm a bit of a messy
painter when it comes to chalk paint if I'm planning
on sanding afterward, like I did with this piece. 
Two coats of paint were applied so that none of the
wood grain would show through, at least not until
I wanted it to!

Rocking Chair Makeover Before & After

I went through a couple of sponge brushes on this
project, they kept getting caught on the small
areas and ripping but otherwise, worked great.

Rocking Chair Makeover Before & After

The second coat covered the wood that was 
showing through and I used a sanding block 
to distress the edges just slightly.

 Rocking Chair Makeover Before & After

Since this chair will be used by little ones I didn't 
really care to wax and rewax when needed, so I pulled
out my can of Minwax clear/satin Polycrylic. I used a
water based brush to apply. You only need a little bit
on your brush at a time since the Poly dries quickly 
and you want to minimize drips. A double coat of Poly
was added to the seat and a few places I know will 
get more wear and tear.

Rocking Chair Makeover Before & After

Now to put this sweetheart back in my now two
year olds Vintage Circus bedroom!

Rocking Chair Makeover Before & After

______________________

I've linked up to the following linky parties:

5.10.2015

Furniture Makeover - Summer Porch Yellow


Furniture Makeover YELLOW Before & After


Warm weather means that I can paint again, yippee!
I've been wanting to give this piece of furniture
a facelift since we moved to VA last year. 
A bit banged up and scratched with moving
but it's still a great piece that sits nicely on 
our stairway landing.

Our walls are grey (darker in the main part of the
house, the photos were taken in our sunroom) and
the yellow pop on the stairway will be a nice addition
to our family sunflower canvas.

I found this scrumptious yellow at AC Moore, it's 
called Summer Porch, by FolkArt Home Decor Chalk.
I used about half of the bottle with two coats for this
project. I'm not the best painter but I like to tackle
projects and get them done and am very happy
with the end result of this one!

Furniture Makeover YELLOW Before & After

Two coats with two different brushes...
I waited a day in between coats since I painted
during nap time but the paint was very quick to dry.

Furniture Makeover YELLOW Before & After

A different day, I pulled the sander out and quickly
edged up my piece, letting the brown pop through
in various places.

Furniture Makeover YELLOW Before & After

Next the Polycrylic, this was very easy to apply
but you need to make sure you don't put too much
on your brush or you'll get unwanted drips
(which can be sanded off, thankfully, oops!)

Furniture Makeover YELLOW Before & After

Two coats of Poly, in two days...again at naptime.

Black Chalkboard SprayPaint

I wanted to paint the drawer pull black but only
had chalkboard paint on hand...I used two nails 
poked through a piece of cardboard to hold my drawer
pull away from any surfaces. The bottom two
photos are what it looked like before. The top pic 
is right after I sprayed, still wet...

Furniture Makeover YELLOW Before & After

Next the drawer, I didn't paint the bottom, since I
knew I was going to line it with something. Found 
this super cute, inexpensive grey and white chevron
drawer liner at Target. 

I unrolled it and folded it over in the corner to create
a cutting crease, pulled it out and slid my scissors
up the folded line. Before taking off the backing,
I made sure it fit inside. Just two small trims, peeled
off the back and stuck it inside. 

Furniture Makeover YELLOW Before & After - Chevron

I'm in love with my little yellow table, 
isn't it sweet?...

Furniture Makeover YELLOW Before & After