9.29.2015

DIY TeePee Tree - Fall Decor

DIY Tee Pee Tree

 While decorating our front porch for fall (it's still
a work in progress) I decided the items 
needed a bit of height...

DIY Tee Pee Tree

I pulled a piece of scrap wood from the pile
in the garage that was 8"X19" and I cut two
8"X8" squares using the chop saw. 

The dowels were leftover from a different project, 
so they were sitting in the scrap wood pile too.

Using a 1/4" spade bit and the screwdriver, holes
were easily scraped out, leaving the perfect 
spot for the dowels to cozy up to.
A bit of liquid nails and a touch of white spray paint
and they sat overnight in the garage till time
was on my side....

DIY Tee Pee Tree

The tops were strategically pinched together as garden
twine was wrapped around the top and a bit of hot glue was used
to seal the twine in place. Once the teepees were finished, 
a knotted loop of twine was all that was used to hang the
 Natural Grapevine Garland (on sale at A.C.Moore
for $2.50) and the rest was loosely wrapped around
the teepee. 

Simple and inexpensive decor, which
will be fun to add lights to as well.

DIY Tee Pee Tree


9.26.2015

LeroyLime Fall Giveaway

WINNER announced on Instagram, 
was it you???
~~~~~~~~~~~~~~~~~~~~~~~~~~

This Giveaway is now CLOSED!


Happy Weekend Everyone!!

In celebration of Fall and all things cozy,  LeroyLime is
having a GIVEAWAY over on my Instagram account...
so make sure you head over there and enter to WIN!

One winner will receive a $10 Starbucks Gift Card
and a surprise fall themed banner from LeroyLime!

Click HERE to Enter

Giveaway ends Wed, Sept 30, 2015

~~~~~~~~~~~~~~~~~~~~~~~

This post is in no way affiliated with 
Starbucks or Instagram

Good Luck!


9.25.2015

Linky Fun


Happy Friday Y'all!! The leaves are starting to turn, the cool mornings are upon us and the projects...well, they are just neverending! If you enjoy fixing up a curb side find, trying your hand at those scary saws in the garage or slapping a few coats of chalk paint onto a piece of furniture that needed a new lease on life, then please visit my Linky Fun Tab above and link up to all the fun blog linky parties that I've found through this wonderful world, we call the internet!

They are sorted and alphabetical, so you can find them again with ease. So go ahead and link up
your shabby, crafty, wowididthat, yummy, trash to treasure, amazing creations and share them with the rest of us!

If you are on Pinterest, you can see linky parties there as well!


**If you have a linky party on your blog and
don't see it on my blog list or Pinterest Board, please send me an email
with your blog link and I'd be happy to add you!

9.22.2015

DIY Fairy Garden

DIY Fairy Garden

Gearing up for a Fairy Themed
Birthday party and I thought the best gift to give the
Birthday Girl would be here very own Fairy Garden!

I asked my handy hubby to build me a tray and he 
whipped up this sweet little one with a scrap piece of
wood & a piece of trim. No time to fill the nail holes
before the party but time enough to put it all together!

DIY Fairy Garden

I had collected some acorn tops and mossy bits of 
tree bark on a bike ride through the woods. A fairy
holding a fox was found at A.C.Moore, along with a
bag of moss (more on the plastic side so it wouldn't 
make a huge mess once finished)

DIY Fairy Garden

I started gluing the moss down piece by piece using
hot glue and filled in any empty spots with smaller
pieces. I used the entire bag of moss for 
this project, since I wanted the moss to look 
gloriously green and full.

DIY Fairy Garden

I placed the fairy on top of the moss and arranged 
the bits of nature I found in the woods. 
I'm not sure who loved it more, the Birthday Girl
or her Mama!

DIY Fairy Garden

~~~~~~~~~~~~~~~~~~~~~~~~~

Please see my linky party list (above)
to see where I've added my DIY
Fairy Garden and join in the fun!

9.18.2015

Giveaway!

**Update** giveaway is CLOSED and the winner
is Manda S. - Congrats!!

~~~~~~~~~~~~~~~~~~~~~~~~~~~~~~

Amber Nicole is celebrating today..cause it's her 30th Birthday!!


Happy Birthday Amber!!

I've teamed up with Amber and some other amazing bloggers to give you a special Birthday Treat

ONE WINNER will receive the following prize(s)
Yes, you read that correct - multiple PRIZES for ONE WINNER!!

~ $100 Giftcard to Target

~ An Ebook copy of The Chronicles of Izzy
The Complete Series and an Ebook copy of
The Misadventures of Maggie Moore

~ Rodan + Fields Micro-Dermabrasion Paste
($78 value)

~ Brown/Glitter Gold Snowflake Cheers
Paper Banner from LeroyLime on Etsy
($25 value)

~ Customized Ring Dish from
EverydayHayley

~ A Random Box of Amber's Favorite Things!


The Giveaway runs all week long, so make sure to tell your friends!!

  a Rafflecopter giveaway

TERMS & CONDITIONS: this giveaway is open to US residents ONLY. By entering you give the right to use your name and likeness. Number of entries received determines the odds of winning. One winner will be selected. This is a giveaway sponsored as a group buy, which means the bloggers pooled their money together to purchase this product for you or are gifting their services. Winner will be drawn by random.org from all verified entries, contacted by email provided, and announced on this page at the end of the contest. Winner has 48 hours to respond or prize will be redrawn. Entrant is responsible for the email address they provide, whether through typing it directly or through the Facebook entry method. Amber Nicole and LeroyLime is not responsible for lost or misdirected emails. All prizes will be awarded. No prize substitutions allowed. This promotion is in no way sponsored, endorsed, administered by, or associated with Facebook and we hereby release Facebook of any liability. Information is provided to Amber Nicole, not to Facebook and your information is never sold or shared. Facebook, Rodan + Fields and Target are not a sponsor of this giveaway. Prize is mailed or emailed directly by Amber Nicole and bloggers giving away items and requires confirmation of delivery. Protected tweets do not count as an entry method for tweeting. Tweets must come from a public account. No purchase necessary. Void where prohibited by law.

8.27.2015

Curbside Makeover - Take 2

This is the second time I've made over this curbside find, 
that I threw into the back of my car when we lived in
Newport, Rhode Island. You can find my first post HERE.

Curbside Makeover Before & After Furniture

I am over the moon with how this turned out and 
can't wait to get started on my next paint project!

First I sanded off the stenciled design off the top.
I wanted to make sure the top would have a smooth 
surface and not leave a flower impression once I was
finished painting. It's the only portion of the piece I
actually sanded since I knew I would be using the
ever-forgiving chalk paint.

I'm also partial to foam brushed when applying chalk
paint, they are inexpensive and I love that I can squish
them into small areas if needed.

Curbside Makeover Before & After Furniture

This is after the first coat of Americana Decor
Chalky Finish "Yesteryear". It's a beautiful pale
grey color, which I love...but I was going for a 
different look to coordinate with the bathroom
mirror where this piece was to reside.

Curbside Makeover Before & After Furniture

I pulled out my Waverly Wax in Antique and started 
applying it with an old t shirt. If you don't want your
dark wax to look so dark, apply a clear wax first.

Curbside Makeover Before & After Furniture


I quickly wiped on the Antique, working with one 
side of my piece at a time. One I'd finish applying, 
I'd start wiping off the wax and rubbing it in, till
I achieved the more worn look.

Curbside Makeover Before & After Furniture


This is after the Antique Wax has been applied 
everywhere. You can see that I didn't put wax
inside on the bottom sections. I had a different
idea for the inside...since the top piece normally
would've held a drawer which was broken
when I first picked up the piece. There was a 
funny little lipped section that I wanted to make 
smooth....

Curbside Makeover Before & After Furniture

Before I get to the insides:
Here are two easy clean up musts.
1. Wipe top of containers with a damp
paper towel, so you can easily unscrew 
the lid again.
2. Wear gloves so your hands don't look 
as fantastic as mine did when I finished!

Curbside Makeover Before & After Furniture

 Here is my fix for the bottoms of the insides...
little pieces of wood. I was going to use paint sticks
but Home Depot was out of the large ones. I found
the next best thing and my hubby introduced me to
the saw, watch out world!

I cut them all to fit using the cool little laser light
and that sassy blade and I'm proud to announce,
I still have all of my fingers!

Curbside Makeover Before & After Furniture

 The back corners of the top section had these little 
pieces that stuck up, so my DH helped me cut the
notches out for those pieces to fit inside.

My sweet helper, Satine...she loves her Mama
and I can always count on her to be nearby.

Curbside Makeover Before & After Furniture

Next I pulled out my Americana Decor Chalky Paint
Everlasting, a nice bright white. Painted all the small 
wooden cut pieces and let them dry. After a second 
coat I quickly sanded them down a bit to make sure
they were nice and smooth on the edges and tops.

Curbside Makeover Before & After Furniture

A bit of Elmer's Wood Glue and some golf balls 
did the trick for easy installation of the wooden
pieces and then only one step to go...

Curbside Makeover Before & After Furniture

Just one coat of Minwax Polycrylic Clear Satin
protective finish and I'm proud to say this beauty
is done!!

Curbside Makeover Before & After Furniture


Here she is in our half bathroom holding 
a few bathroom essentials...

Curbside Makeover Before & After Furniture

~~~~~~~~~~~~~~~~~~~~~~~~~~~

Please view my Linky Fun tab at the top of
the blog to see a few of the blog parties I like to join!

8.19.2015

Lego Birthday Party Ideas

I love planning parties...but
my kids usually get the short end of the 
party planning stick since Mama is running
around like a crazy last-minute lady! 
(crafting party items for LeroyLime on Etsy)

Lego Birthday Party Ideas

If I haven't mentioned before...well, I don't do cakes, 
I'm more of a paper gal, so if you need a paper cake,
I've got you covered but those tend to not like flame.

I asked the lady behind the cake counter for a lego cake and 
my son was happy, so win win for this Mama...
and onto the decorations and party favors.

We held my son's 5th Birthday at the bowling alley,
(he's now 7)
which makes for easy cleanup and is a great venue
if you are looking for something fun for the kids
to do without breaking the bank!

The party patrons weren't many, so I opted for a small
box of legos for each child and made a "thank you" lego
bookmark, that I had my son color for his friends. 

I printed out a lego man online, typed a little thank
you note, attached to a piece of 
cardstock and added a piece of bakers twine. Bam!

Lego Birthday Party Ideas

Pizza, Cake, Legos and Lemonade 

A simple party that everyone enjoyed...
just wish I had taken more photos!

Below are a few of my favorite Pinned Lego Party Ideas,
if you've got some great ones, please link them
in the comments!

Betty Crocker nailed it with these lego cakes using
marshmallows!! Pure genius!

If you'd rather have cookies than cakes at your Lego
Party, check out this fabulous Lego Man Cookie
tutorial from Sweet Sugar Belle.

Surviving the Stores created a fun post
on how to have a Lego Birthday Party
for under $100.

For more fun Birthday Boy Ideas, click on 
my Pinterest board below...
  

7.30.2015

Playroom Makeover


Playroom Makeover with Leftover Paint

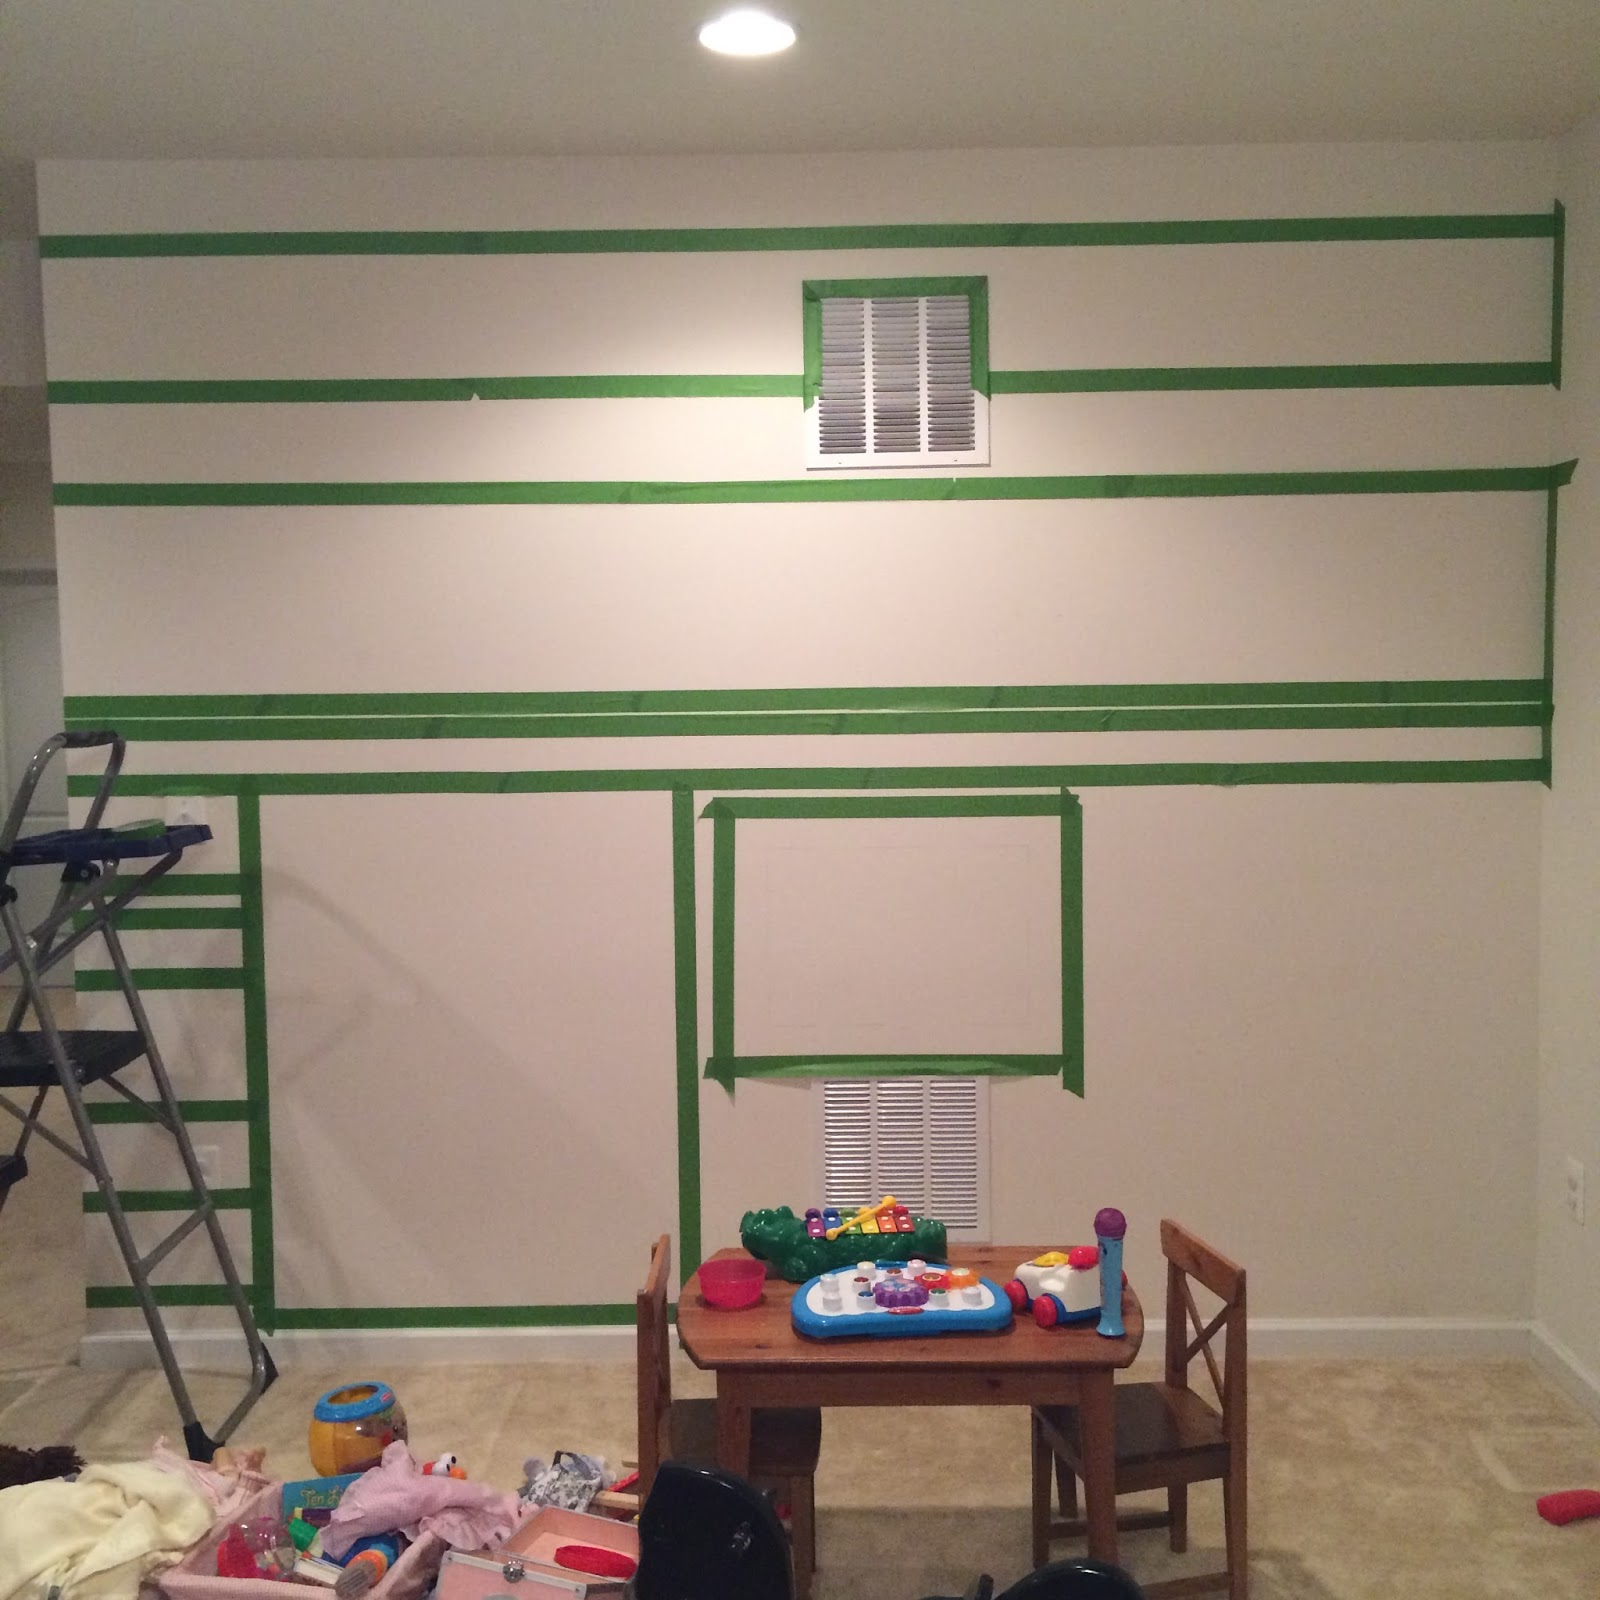
Our basement playroom was in need of a little
pizzazz, so out came the painters tape and all the 
leftover paint that has been used around our home.

Here is the wall...

"Before"

...and here is what I taped out. I used a large level to
add marks on the wall and then taped along the wall,
matching up to the pencil marks (making sure I would 
be covering them with paint).

I knew I wanted the kitchen in the right corner, so
decided to leave that blank...

Playroom Makeover with Leftover Paint

A chalkboard spot for drawing on the left, I painted
over every section twice before peeling off the tape.

The yellow spot is a little too pale for my taste but 
it's where the magnetic board is hung with the kids
fridge magnets below in a basket. 

So a few hours of taping one day, painting and 
reorganizing the toys the second day and now 
there is a little more cheer in our dark basement!

Playroom Makeover with Leftover Paint
"After"