Showing posts with label #diy. Show all posts

9.07.2021

Create a Mug Herb Garden: DIY Crafts For the Whole Family to Enjoy

You can never have too many coffee mugs — until you realize your cupboard is packed to the brim and you find yourself praying they don’t come crashing down every time you open the cabinet door. When it's time to declutter and get organized, find a new purpose for those unused mugs by making a coffee mug herb garden.
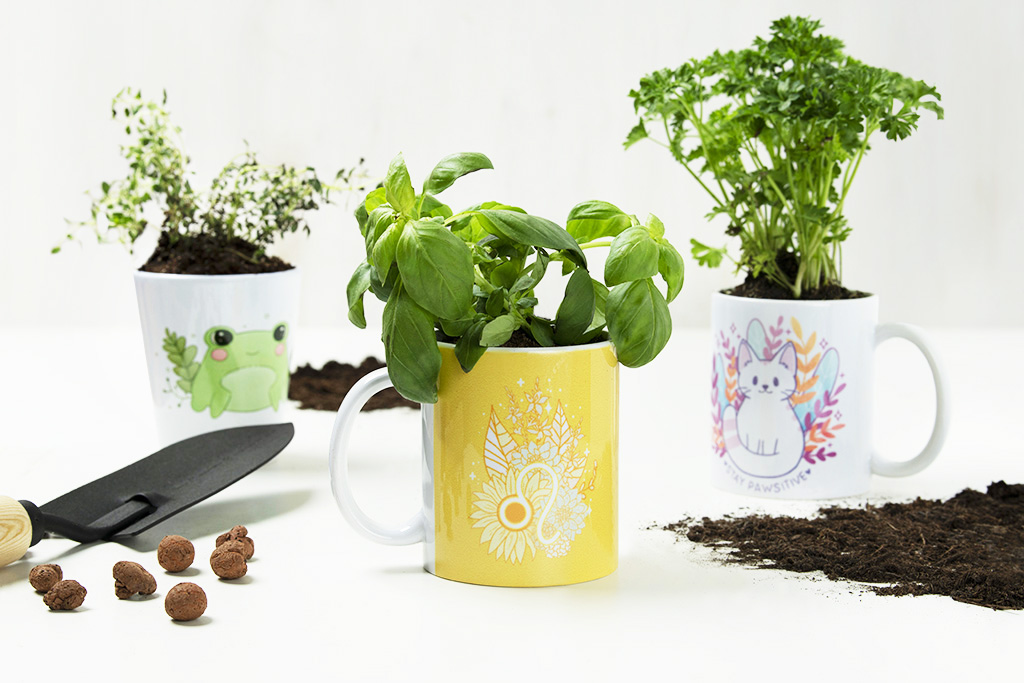


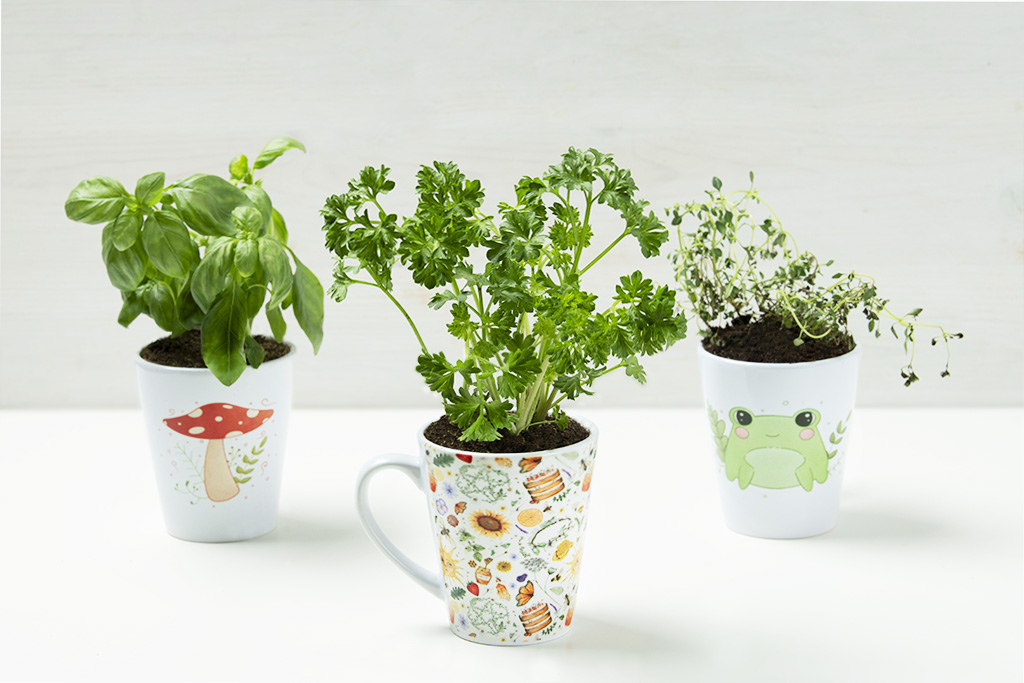
This is a great way to repurpose old dishes while keeping fresh herbs in your kitchen ready to be used for delicious meals. Get the kids involved and make it a fun DIY party that they are sure to enjoy! Read on to find out how to make your own mug herb garden and find inspiration for your next project.

Gather All of the Necessities

With a few simple materials, you can create an atmosphere where your herbs will thrive. These simple mug herb garden materials will create long-lasting herbs that you will love all summer:


  • A fun mug

  • Soil

  • River rocks

  • Decorations if you feel like giving the herb some character

Locate a Sunny Spot
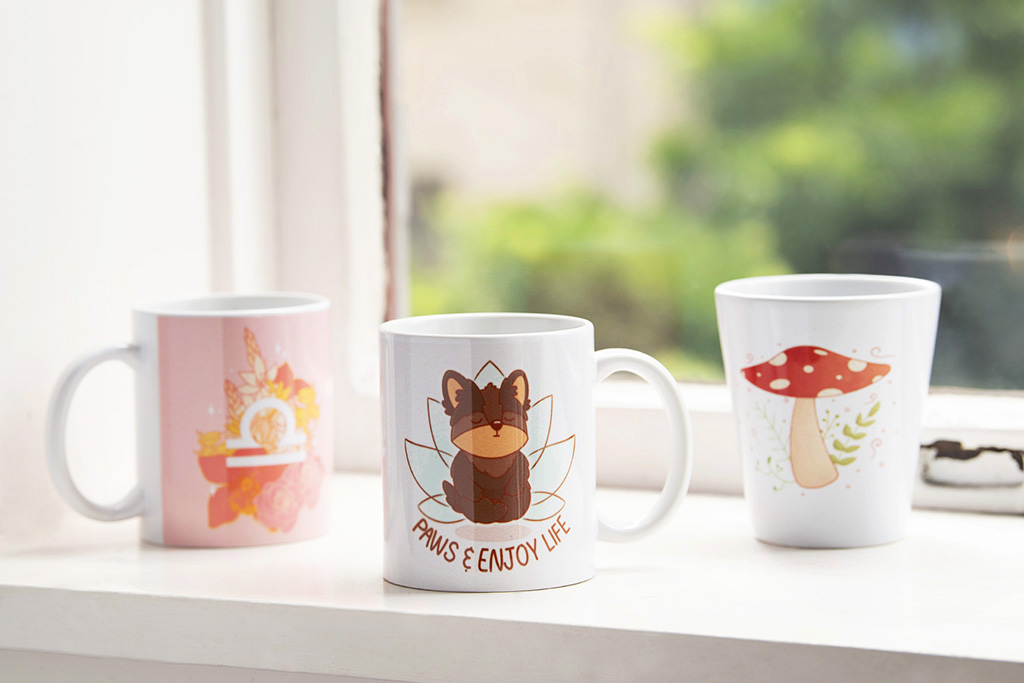
When thinking about what spot in your home is best for your herbs, consider a few options before closing in on one space. This area of your home could be your kitchen, a windowsill, or anywhere with proper access to sunlight. 

Popular Herbs to Grow 
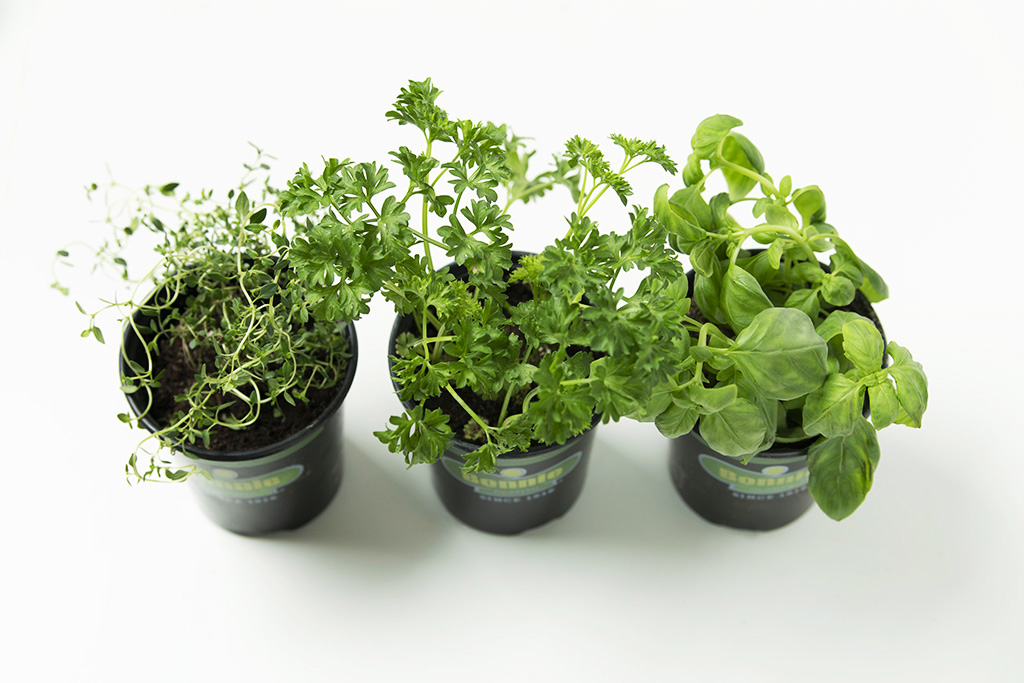
While you may not be an expert on growing herbs, there are a ton of easy, fast-growing plants that you can choose from. As long as you have the proper nutrients and a supportive atmosphere, your herbs will be growing in no time. 


Make sure that you choose a mug that will support the growth of the herb. For instance, tall herbs like basil need a deeper mug while bushy herbs like parsley thrive in wider mugs. Here’s a list of some of the more popular herbs to grow indoors:


  • Basil

  • Mint

  • Thyme

  • Cilantro

  • Rosemary

  • Parsely

  • Chives

  • Dill

Pick your Mug

Time to choose your favorite mug that your herbs will be growing inside. This can be an engaging part of the growing process if you choose to purchase a mug or use a mug that has been pushed to the back of your cabinet. It’s all up to you! 


Plant Your Herbs
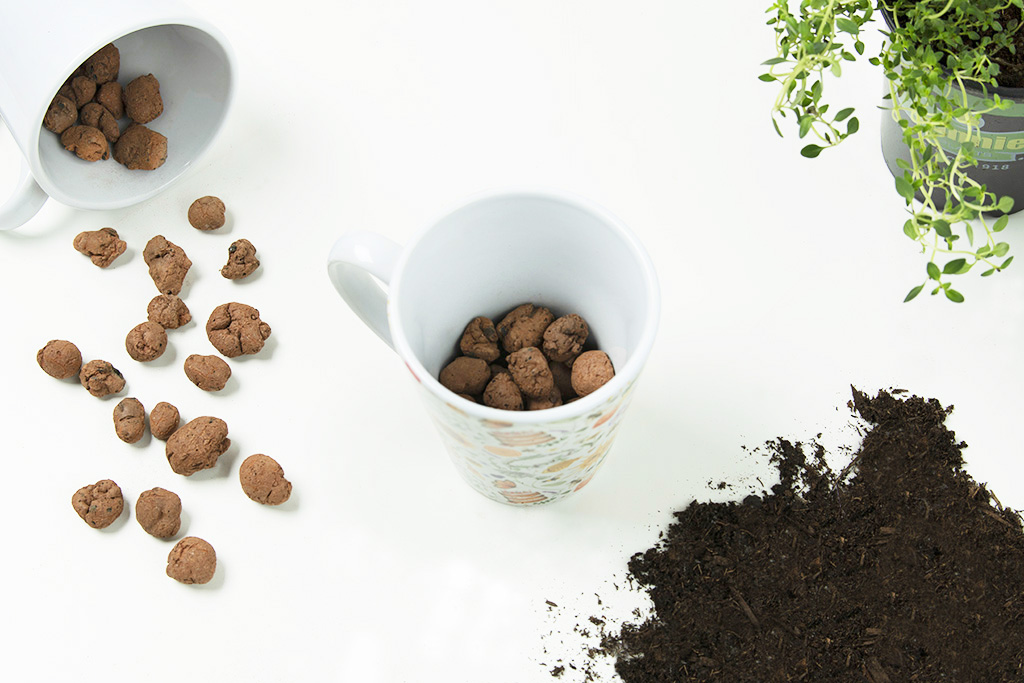
Add your soil to the mug about half an inch from the top. You will want to make sure that this is evenly distributed throughout the mug to prevent the mug from tipping over. 


Tease the roots of the herbs if you are using baby herbs and add a bit of water after the roots have been planted. River rocks will add a bit of irrigation for excess water. 

Decorate and Label Your Herbs 

With your location chosen and your herbs budding, you can decorate this area or decorate your mug however you choose. You can go crazy with paints or designs on the outside of the mug as long as you do not disrupt the herb. 


Your kids could even take turns coloring the outside of the mug and grow their own herbs to be used in your famous dinner dishes. Use these printable herb labels that you and your kids will love and look forward to growing more plants this summer. 


5.05.2020

DIY Mother’s Day Gift Tags

As many of us are spending more time at home, it’s the perfect time for a DIY project. With Mother’s Day approaching, we wanted to share these free and elevated DIY gift tags perfect for wrapping.  

DIY Mother's Day Gift Tags


These free gift tags from our friends at Zola are perfect for other special occasions such
as birthdays, weddings, baby showers, and more. Check out our four unique designs
that you can download and print at home. 

Whether you are gifting something wellness focused or sentimental, these gift tags are
the perfect way to dress up your present. You can download the blank gift tags here. 


Materials needed:
A printer 
Cardstock
A pair of scissors
Ribbon
A hole puncher 

8.27.2019

DIY Natural Bug Remedies


Now that summer has reached its peak and the kids are getting ready to go back to school, if they haven't already, you may be looking forward to some much-earned relaxation indoors. However, these last few weeks of the season can be much less relaxing if you’re dealing with a bug situation in your home. 

The warm weather tends to bring out more of these pesky critters, but you need to find a healthy way to get rid of them. Pesticides contain chemicals that are harmful to humans and pets as well as bugs, so instead take a look at these DIY bug repellent tricks from TurboTenant  Each of the 8 recipes has been tailored for individual summer pests and uses natural ingredients found in the home! Happy debugging! 

DIY Herb Sachets for Pantry Moths - Natural Bug Remedy

Sugar Bottle Trap for Black Flies - DIY Natural Bug Remedy


9.20.2018

DIY Your Own Doormat With These 11 Free Printables

When you invite somebody over to your house the first thing they usually see is your doormat. It’s the welcoming sign to anyone dropping off packages or the neighbor who stops by to borrow some sugar. That’s why I’ll never understand why so many doormats are, well, boring! 

Stores sell the same old doormats so it’s hard to find one that truly reflects your personality. Lucky for you, it’s not difficult to make one yourself! It’s a great opportunity to show off your personality and reflect your personal style. 

DIY your own Doormat using these 11 FREE Printable Stencils

Wondering where to begin? This tutorial from Simply Self Storage is a step-by-step guide to making your own doormat. It includes detailed instructions with visuals, as well as my favorite part: 11 printables to use as stencils. There are so many options to choose from, from the basic “Live Laugh Love,” to the more playful “The Password is Guacamole.” 

Once you choose your stencil and gather all of your materials you will need to cut out the stencil. Now, this can be tricky. Those not experienced with an exacto knife might want to pick the larger, blockier designs first. 

When cutting, you’ll want to cut through the stencil AND the tape, but avoid cutting through your mat. This isn’t too difficult but does take some finesse. The straight lines will be easier to cut out than cursive designs, so plan accordingly. 

Below, I’ve included a list of materials and basic instructions for making your own DIY doormat. Follow these steps and soon you’ll your very own custom piece of outdoor art. Happy creating! 

DIY your own Doormat using these 11 FREE Printable Stencils

Materials You Will Need: 
Blank coir mat (standard outdoor mat) 
Outdoor acrylic paint 
Foam paint brushes 
Exacto knife 
Cardstock 
Painter’s Tape 
Pins 
Printer 
And a downloaded stencil! 

1. Choose Your Design and Print it Out

DIY your own Doormat using these 11 FREE Printable Stencils

2. Tape Your Mat Securely

DIY your own Doormat using these 11 FREE Printable Stencils

3. Arrange the Stencil on Your Mat

DIY your own Doormat using these 11 FREE Printable Stencils

4. CAREFULLY Cut Out Your Design

DIY your own Doormat using these 11 FREE Printable Stencils

5. Paint Several Coats

DIY your own Doormat using these 11 FREE Printable Stencils

DIY your own Doormat using these 11 FREE Printable Stencils

6. Let Dry and Reveal Your Design

DIY your own Doormat using these 11 FREE Printable Stencils

7. Enjoy Your Doormat!

DIY your own Doormat using these 11 FREE Printable Stencils

8.17.2018

DIY Marbled Paper

Marbled paper has been everywhere lately. From wedding decor to home accents, this trendy and stylish look is one that’s not going away anytime soon. If you’re looking for a fun project you can occupy the kids with that will double as decor or gifts, look no farther. Marbling paper is a fun way to recreate this trendy look at home.

how to marble paper : DIY with LeroyLime

To help you get started, FTD walks you through how to marble paper in 7 super simple steps. An added bonus? You probably already have most of the materials at home. This is a fun craft to get creative with. You can transform simple white piece of cardstock into a work of art by exploring different color schemes and trying new patterns.

So what are you waiting for? Let the marbling begin!

how to marble paper materials : LeroyLime

Materials: Baking sheet Shaving cream (must be foam not gel) Watercolors and acrylic paint Cardstock Paintbrush Dropper Scraper (paint scraper, ruler or any flat edge) Step 1: Fill the baking sheet with shaving cream.

how to marble paper step 1 : DIY with LeroyLime
 
 Step 2: Smooth out the surface of the shaving cream.

how to marble paper step 2 : DIY with LeroyLime
 
 Step 3: Add in two to three colors with a dropper.

how to marble paper step 3 : DIY with LeroyLime
 
 Step 4: Swirl the colors in a figure 8 pattern.

how to marble paper step 4 : DIY with LeroyLime
 
 Step 5: Lightly press the cardstock into the shaving cream.

how to marble paper step 5 : DIY with LeroyLime
 
 Step 6: Remove and scrape off the extra shaving cream.

how to marble paper step 6 : DIY with LeroyLime
 
Step 7: Let dry and put on display!

how to marble paper inspiration : DIY with LeroyLime
 

2.05.2018

DIY Upcycled Jewelry Holder

Happy Monday!! Can't believe February has already arrived...along with some snow. I took a moment this morning to walk outside our village and soak in the peaceful cool quiet of a new day. The snow so perfectly covered every rooftop and tree in a precise blanket of unblemished white. The perfect start to my day after dropping our youngest off at kinder and before I tackle our mound of ski laundry from the weekend...but not before I've had my coffee!

One of my latest DIY projects was to figure out where to put my jewelry since I sold my jewelry armoire before we moved. If you remember, I made a smaller version of a jewelry holder for a teen that lived next to us in VA, you can see that HERE.


DIY Jewelry Holder - Upcycled - LeroyLime


I guess you can say I've gotten quite a bit of use out of the doors we removed from our laundry room, since that's what I used for this project. I needed something I could set up on my dresser and not hang on the walls since most of them are hard to hang anything on here in Germany. I also wanted a splash of color in our closet, since we are renting and can't paint the walls, so I looked through my chalk paint stash and chose this lovely lavender shade.


DIY Jewelry Holder - Upcycled - LeroyLime


No prep work for me, just slapped two coats on and roughed up the edges a bit with a sanding block. I dug through my hubby's tool box and found a few white hooks and cup hooks I had left over from another project and attached them around the edges. 
DIY Jewelry Holder - Upcycled - LeroyLime

I'm pretty excited with how it turned out and love that it adds color and charm to our closet room. I destashed a bunch of my unworn jewelry before we moved as well, always feels good to declutter!

DIY Jewelry Holder - Upcycled - LeroyLime

Here's the jewelry holder in all it's glory sitting on top of my dresser. The lighting isn't the greatest but I wanted to share how I display the rest of my jewels. I have a few trinket boxes, the brown cedar one my Dad recently made for me. The two trees I used to have on our mantle won't fit anywhere in this house, so I have them adding a bit of greenery to my jewelry set up and they double as clip holders too! How do you display your jewelry? I'd love to see, share a link in the comments or let me know your favorite part of this DIY project.

DIY Jewelry Holder - Upcycled - LeroyLime

I've linked up to the following Linky bits of fun:


12.14.2017

DIY Mason Jar Snow Globe

Working on festive arts and crafts projects with your kids is the perfect way to get into the holiday spirit! It’s double the fun when the project can also be used as an adorable Christmas decoration or special holiday gift! 


This mason jar snow globe is so unique and is the perfect holiday craft to squeeze in before Christmas. Shutterfly’s step-by-step guide breaks the project down into 7 easy steps, making it super simple for the kiddos to get involved in the holiday crafting fun. Once finished, the snow globe would be the perfect Christmas present to pair with your holiday card to friends and family. There are so many creative ways to customize these snow globes that I know you will want to make more than one!


1.12.2017

DIY Gift Grads Will LOVE

With the fresh start of a new year, there are plenty of celebrations to look forward to. I'm sure they are already starting to fill the pages of your pretty new day planners. With those celebrations come gifts and with gift giving, the SEARCH...for the perfect gift!

With a bit of hot glue and a few sugary treats, this DIY candy box is as easy as one, two, three and can be filled with more sweets or other trinkets perfect for the gift receiver. 
DIY Grad Gift - Candy Treat & Centerpiece - LeroyLime

If you'd like to use this gift as a table centerpiece for a party, add a cup or vase inside the box and fill with flowers or a balloon. You can also wrap the outside candy boxes to fit your party color scheme.

How to Create a Candy Gift Box - LeroyLime

Items Needed: 
5 boxes of candy
hot glue gun/hot glue sticks
shredded paper filler
smaller candy items
a plastic cup or vase 

Directions:
1. buy your candy and anything else you'd like to add
2. match similar sized boxes together and start gluing
3. continue adding one box at a time on a flat surface
4. box is complete - stand back and smile
5. add filler and fun items for your gift receiver

DIY Grad Gift - Candy Treat & Centerpiece - LeroyLime


10.21.2016

DIY Wood Photo Backdrop

I've been slowly changing over my Etsy shop photos to a white background but first had to build one in order to do so. I needed something a little larger since I photograph banners and a small sheet of 12X12 will only stretch so far, so off to the hardware store...

DIY Wood Backdrop for your ETSY shop photos - LeroyLime

I purchased two sheets of TriPLY Underlayment 4X8' - I needed something that was going to be light enough for me to move around but sturdy enough so it wouldn't break in half. No special cuts, I just started cutting different lengths of the boards with a table saw, one board was cut horizontally and the other vertically, so I ended up with short and long boards.

DIY Wood Backdrop for your ETSY shop photos - LeroyLime

Once all the pieces were cut, I lined up all the horizontally cut ones and then laid the vertically cut ones on top in a random pattern. I had to pause to call my Dad and ask how to change out the liquid nails tube, happens to the best of us! and then I started gluing each board in place and put down scrap wood on top to help set it in place.

DIY Wood Backdrop for your ETSY shop photos - LeroyLime

Once everything had set, I waited till the next day, I pulled out the sander and sanded both sides and rounded the corners a bit. The plans were to make one side white and make the other side more vintage but I just kept them both white. Two coats of paint on each side and I have a background perfect for photographing my Etsy shop items!

DIY Wood Backdrop for your ETSY shop photos - LeroyLime

Have you created your own photography backdrop? 
I'd love to see. Link your backdrop blog post in the comments!


7.26.2016

DIY Jewelry Holder from an Upcycled Door

I love summer!! Not only do I love the warm weather but I feel like I can tackle my mile long DIY to do list and finish it in only a day! That never happens...but I do check items off and add new ones!

My latest DIY is this jewelry holder that I made for our neighbors teen daughter. I've been helping make over her room and she needed a place to put all of her pretty baubles instead of the top of her dresser. 

DIY Jewelry Holder - Upcycled Door - LeroyLime

The shutter was FREE, can't beat that! It's actually half of a folding shutter door that we removed from our laundry room closet area. The doors were never shut and the laundry room closet is pretty enough to leave exposed, so we removed the doors and hardware. The other half of this door, I have on our mantle. I quickly took a sander and roughed up the edges a bit for more of a chippy paint look and then painted the wooden knob, that I kept when I cut the door in half, and the entire edge with two coats of chalk paint.

DIY Jewelry Holder - Upcycled Door - LeroyLime

I drilled three holes on the larger top section of the door to add three door knobs but when screwing one of them in, it broke...it happens...oh well, I had just finished organizing my hubby's tools in the garage and knew I had a few hooks left over from an IKEA haul, so I added those instead.

The only purchase I made for this project was a box of white cup hooks that I predrilled before screwing in. The ones on the sides I placed at 12 inches apart to allow for necklaces to hang. The bottom row is great for bracelets or more necklaces and the middle portion of the door, is the perfect spot to keep earrings untangled and paired together. 

I attached a large hardy picture hanger hardware on the back and can now say that this jewelry holder is feeling glamorous and is so happy not sitting in the wood pile in our garage.

DIY Jewelry Holder - Upcycled Door - LeroyLime

Paint Color: Home Decor Chalk Paint
34803 - Patina

DIY Jewelry Holder - Upcycled Door - LeroyLime


7.22.2016

Friday Favorites - Week 330 - Summer DIY

Happy sunny Friday All!! Hope you've been soaking in the vitamin D, enjoying the pool, getting your hands dirty in the garden and tackling any DIY projects while the weather is warm enough to work outside! We are back from our family trip to Iowa and it feels good to get back into the swing of things at home again...and back to more DIY! I can never get enough DIY, so with that in mind, these 4 awesome summer DIY projects screamed at me this week, aren't they FANTASTIC?! 

awesome summer DIY projects - Friday Favorites Features - leroylime


Say HELLO to our lovely hosts this week:


~~~~~~~~~~~~~~~~~~~~~~~~~~~~~~~~~~~

I used the FREE online collage maker fotojet to make the stunning collage above. It was very easy to use and quite similar to a few other editing programs I've used before. 

FotoJet enables you to create amazing collages, photo cards, posters Facebook covers, Twitter headers, YouTube banners, fun photos and more. Below are some highlighted features:

* Comes with 500+ templates that can be freely edited and 80+ adjustable layouts.
* Provides users with the ability to create collage from templates or from scratch.
* Offers 500+ clipart images and lots of text samples.
* Supports advanced editing features like Undo/Redo, Snap, etc. 

~~~~~~~~~~~~~~~~~~~~~~~~~~~~~~~~~~~~~

If you were featured this week, snag the button below to display 
proudly on your blog, you earned it!


Can't wait to see what you link up!!


Financial compensation from Fotojet was not received for this post. 
Opinions expressed here are my own.

7.08.2016

Friday Favorites - Week 328 - DIY Wedding Sign

Happy Friday everyone!! I hope you are all having fun in the sun soaking up lots of natural vitamin D and enjoying summer now that it's in full swing!

Who doesn't love a summer wedding? I fell in love with this DIY Rustic Wedding Sign that The Country Chic Cottage posted on myprintly.com. I've always been a little hesitant to paint a sign but this tutorial made it look so easy, I can't wait to make one for myself, with a different phrase of course...or maybe just an arrow. The sky's the limit on what you can create.

DIY rustic wedding sign

A shout out to these ladies, your hosts for the Friday Favorites linky party:


Hosted by:

Please grab the button below if you were featured this week:


Please link up below: