Showing posts with label DIY. Show all posts

5.05.2020

DIY Mother’s Day Gift Tags

As many of us are spending more time at home, it’s the perfect time for a DIY project. With Mother’s Day approaching, we wanted to share these free and elevated DIY gift tags perfect for wrapping.  

DIY Mother's Day Gift Tags


These free gift tags from our friends at Zola are perfect for other special occasions such
as birthdays, weddings, baby showers, and more. Check out our four unique designs
that you can download and print at home. 

Whether you are gifting something wellness focused or sentimental, these gift tags are
the perfect way to dress up your present. You can download the blank gift tags here


Materials needed:
A printer 
Cardstock
A pair of scissors
Ribbon
A hole puncher 

8.27.2019

DIY Natural Bug Remedies


Now that summer has reached its peak and the kids are getting ready to go back to school, if they haven't already, you may be looking forward to some much-earned relaxation indoors. However, these last few weeks of the season can be much less relaxing if you’re dealing with a bug situation in your home. 

The warm weather tends to bring out more of these pesky critters, but you need to find a healthy way to get rid of them. Pesticides contain chemicals that are harmful to humans and pets as well as bugs, so instead take a look at these DIY bug repellent tricks from TurboTenant  Each of the 8 recipes has been tailored for individual summer pests and uses natural ingredients found in the home! Happy debugging! 

DIY Herb Sachets for Pantry Moths - Natural Bug Remedy

Sugar Bottle Trap for Black Flies - DIY Natural Bug Remedy


9.20.2018

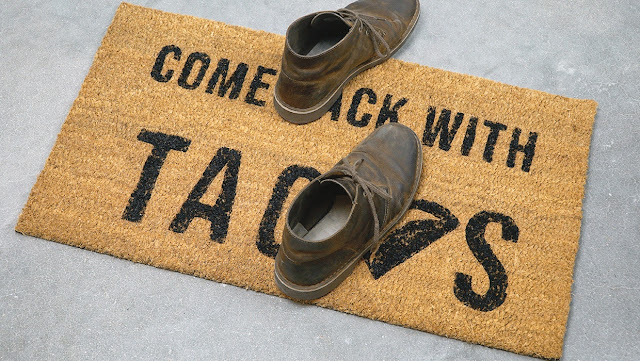
DIY Your Own Doormat With These 11 Free Printables

When you invite somebody over to your house the first thing they usually see is your doormat. It’s the welcoming sign to anyone dropping off packages or the neighbor who stops by to borrow some sugar. That’s why I’ll never understand why so many doormats are, well, boring! 

Stores sell the same old doormats so it’s hard to find one that truly reflects your personality. Lucky for you, it’s not difficult to make one yourself! It’s a great opportunity to show off your personality and reflect your personal style. 

DIY your own Doormat using these 11 FREE Printable Stencils

Wondering where to begin? This tutorial from Simply Self Storage is a step-by-step guide to making your own doormat. It includes detailed instructions with visuals, as well as my favorite part: 11 printables to use as stencils. There are so many options to choose from, from the basic “Live Laugh Love,” to the more playful “The Password is Guacamole.” 

Once you choose your stencil and gather all of your materials you will need to cut out the stencil. Now, this can be tricky. Those not experienced with an exacto knife might want to pick the larger, blockier designs first. 

When cutting, you’ll want to cut through the stencil AND the tape, but avoid cutting through your mat. This isn’t too difficult but does take some finesse. The straight lines will be easier to cut out than cursive designs, so plan accordingly. 

Below, I’ve included a list of materials and basic instructions for making your own DIY doormat. Follow these steps and soon you’ll your very own custom piece of outdoor art. Happy creating! 

DIY your own Doormat using these 11 FREE Printable Stencils

Materials You Will Need: 
Blank coir mat (standard outdoor mat) 
Outdoor acrylic paint 
Foam paint brushes 
Exacto knife 
Cardstock 
Painter’s Tape 
Pins 
Printer 
And a downloaded stencil! 

1. Choose Your Design and Print it Out

DIY your own Doormat using these 11 FREE Printable Stencils

2. Tape Your Mat Securely

DIY your own Doormat using these 11 FREE Printable Stencils

3. Arrange the Stencil on Your Mat

DIY your own Doormat using these 11 FREE Printable Stencils

4. CAREFULLY Cut Out Your Design

DIY your own Doormat using these 11 FREE Printable Stencils

5. Paint Several Coats

DIY your own Doormat using these 11 FREE Printable Stencils

DIY your own Doormat using these 11 FREE Printable Stencils

6. Let Dry and Reveal Your Design

DIY your own Doormat using these 11 FREE Printable Stencils

7. Enjoy Your Doormat!

DIY your own Doormat using these 11 FREE Printable Stencils

8.17.2018

DIY Marbled Paper

Marbled paper has been everywhere lately. From wedding decor to home accents, this trendy and stylish look is one that’s not going away anytime soon. If you’re looking for a fun project you can occupy the kids with that will double as decor or gifts, look no farther. Marbling paper is a fun way to recreate this trendy look at home.

how to marble paper : DIY with LeroyLime

To help you get started, FTD walks you through how to marble paper in 7 super simple steps. An added bonus? You probably already have most of the materials at home. This is a fun craft to get creative with. You can transform simple white piece of cardstock into a work of art by exploring different color schemes and trying new patterns.

So what are you waiting for? Let the marbling begin!

how to marble paper materials : LeroyLime

Materials: Baking sheet Shaving cream (must be foam not gel) Watercolors and acrylic paint Cardstock Paintbrush Dropper Scraper (paint scraper, ruler or any flat edge) Step 1: Fill the baking sheet with shaving cream.

how to marble paper step 1 : DIY with LeroyLime
 
 Step 2: Smooth out the surface of the shaving cream.

how to marble paper step 2 : DIY with LeroyLime
 
 Step 3: Add in two to three colors with a dropper.

how to marble paper step 3 : DIY with LeroyLime
 
 Step 4: Swirl the colors in a figure 8 pattern.

how to marble paper step 4 : DIY with LeroyLime
 
 Step 5: Lightly press the cardstock into the shaving cream.

how to marble paper step 5 : DIY with LeroyLime
 
 Step 6: Remove and scrape off the extra shaving cream.

how to marble paper step 6 : DIY with LeroyLime
 
Step 7: Let dry and put on display!

how to marble paper inspiration : DIY with LeroyLime
 

2.05.2018

DIY Upcycled Jewelry Holder

Happy Monday!! Can't believe February has already arrived...along with some snow. I took a moment this morning to walk outside our village and soak in the peaceful cool quiet of a new day. The snow so perfectly covered every rooftop and tree in a precise blanket of unblemished white. The perfect start to my day after dropping our youngest off at kinder and before I tackle our mound of ski laundry from the weekend...but not before I've had my coffee!

One of my latest DIY projects was to figure out where to put my jewelry since I sold my jewelry armoire before we moved. If you remember, I made a smaller version of a jewelry holder for a teen that lived next to us in VA, you can see that HERE.


DIY Jewelry Holder - Upcycled - LeroyLime


I guess you can say I've gotten quite a bit of use out of the doors we removed from our laundry room, since that's what I used for this project. I needed something I could set up on my dresser and not hang on the walls since most of them are hard to hang anything on here in Germany. I also wanted a splash of color in our closet, since we are renting and can't paint the walls, so I looked through my chalk paint stash and chose this lovely lavender shade.


DIY Jewelry Holder - Upcycled - LeroyLime


No prep work for me, just slapped two coats on and roughed up the edges a bit with a sanding block. I dug through my hubby's tool box and found a few white hooks and cup hooks I had left over from another project and attached them around the edges. 
DIY Jewelry Holder - Upcycled - LeroyLime

I'm pretty excited with how it turned out and love that it adds color and charm to our closet room. I destashed a bunch of my unworn jewelry before we moved as well, always feels good to declutter!

DIY Jewelry Holder - Upcycled - LeroyLime

Here's the jewelry holder in all it's glory sitting on top of my dresser. The lighting isn't the greatest but I wanted to share how I display the rest of my jewels. I have a few trinket boxes, the brown cedar one my Dad recently made for me. The two trees I used to have on our mantle won't fit anywhere in this house, so I have them adding a bit of greenery to my jewelry set up and they double as clip holders too! How do you display your jewelry? I'd love to see, share a link in the comments or let me know your favorite part of this DIY project.

DIY Jewelry Holder - Upcycled - LeroyLime

I've linked up to the following Linky bits of fun:


7.26.2016

DIY Jewelry Holder from an Upcycled Door

I love summer!! Not only do I love the warm weather but I feel like I can tackle my mile long DIY to do list and finish it in only a day! That never happens...but I do check items off and add new ones!

My latest DIY is this jewelry holder that I made for our neighbors teen daughter. I've been helping make over her room and she needed a place to put all of her pretty baubles instead of the top of her dresser. 

DIY Jewelry Holder - Upcycled Door - LeroyLime

The shutter was FREE, can't beat that! It's actually half of a folding shutter door that we removed from our laundry room closet area. The doors were never shut and the laundry room closet is pretty enough to leave exposed, so we removed the doors and hardware. The other half of this door, I have on our mantle. I quickly took a sander and roughed up the edges a bit for more of a chippy paint look and then painted the wooden knob, that I kept when I cut the door in half, and the entire edge with two coats of chalk paint.

DIY Jewelry Holder - Upcycled Door - LeroyLime

I drilled three holes on the larger top section of the door to add three door knobs but when screwing one of them in, it broke...it happens...oh well, I had just finished organizing my hubby's tools in the garage and knew I had a few hooks left over from an IKEA haul, so I added those instead.

The only purchase I made for this project was a box of white cup hooks that I predrilled before screwing in. The ones on the sides I placed at 12 inches apart to allow for necklaces to hang. The bottom row is great for bracelets or more necklaces and the middle portion of the door, is the perfect spot to keep earrings untangled and paired together. 

I attached a large hardy picture hanger hardware on the back and can now say that this jewelry holder is feeling glamorous and is so happy not sitting in the wood pile in our garage.

DIY Jewelry Holder - Upcycled Door - LeroyLime

Paint Color: Home Decor Chalk Paint
34803 - Patina

DIY Jewelry Holder - Upcycled Door - LeroyLime


6.15.2016

Quick Bench Makeover

We've had this red bench for about 12 years. Picked it up from IKEA in Germany for our small hall entryway and it was the perfect fit. Each home we've moved into, the bench has found a useful spot, except our current home. I actually had it out in our garage sale and I'm surprised no one snatched it up. 

Quick Bench Makeover - Before & After - LeroyLime

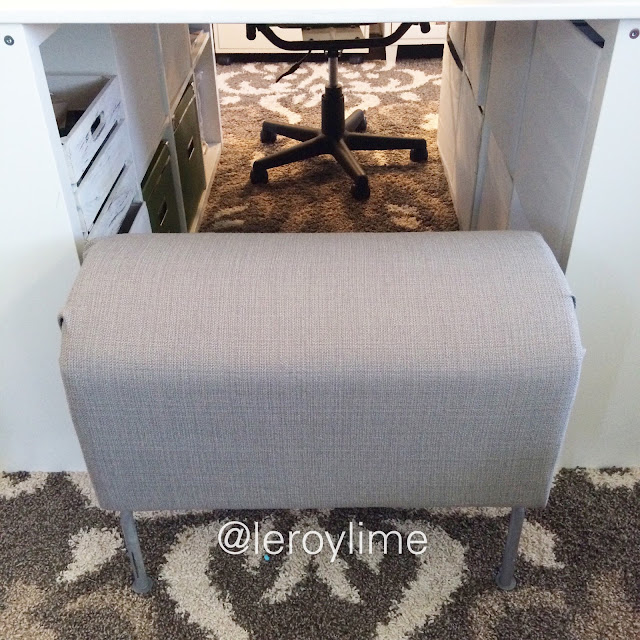
The red has left our home for more soothing grey tones but the bench still had so much life left in it, I decided to try to paint it. Looked up a how-to on Pinterest and a few blogs and no luck, total Pinterest fail. After cleaning out a closet, I found a grey tablecloth that we had used as a curtain in our youngest nursery. 

I pulled out the staple gun and started stapling, starting from the center and working my way out. Once I had the long side stapled, the ends were a bit trickier. I've never recovered anything before but you've got to start somewhere.

Quick Bench Makeover - Before & After - LeroyLime

The fabric at the ends was too much to staple, so I pulled it towards the center, stapling as I smoothed out the wrinkles and ended up cutting out quite a bit of fabric before folding over the very top section and stapling underneath. Sort of looks like an elephant's trunk...

Quick Bench Makeover - Before & After - LeroyLime

and now I have the perfect bench for the sewing side of my craft table. When it's not being used, it tucks neatly underneath the desk.

Quick Bench Makeover - Before & After - LeroyLime

Quick Bench Makeover - Before & After - LeroyLime


6.03.2016

Pallet Herb Garden

My Father in Law and I rescued this raw pallet from our neighbor's curb last year and it sat and weathered in our back patio area just waiting to be useful. The poor lonely thing just needed a purpose to feel loved again and I believe we've found the perfect solution, as an herb garden!

DIY Pallet Herb Garden - Before & After - LeroyLime the Blog

My dear hubby was put to work, yet again. While I planted our garden, he cut pieces to fit into the bottoms of four sections. I had him remove just one of the boards on the front and had plans to paint the pallet but got a little bit impatient, so the painting will have to wait for another day, season, or never.

Turn your Pallet into an Herb Garden - DIY - LeroyLime the Blog

He sanded any rough edges and I quickly lined each section with weed barrier fabric, no stapling needed since the weight of the dirt will hold it into place. I just wanted to make sure my dirt would stay in each section and not wash through any cracks. Our 5 and 2 year old helped fill each section with dirt and then I arranged the herbs where I thought they looked best. Filling in with a flower where I was one short. Then gently placed each plant into it's new nesting home. 

A drink of fresh cold water...and I think the plants and pallet are quite happy together, wouldn't you agree?

Pallet Herb Garden - LeroyLime the Blog

4.15.2016

Friday Favorites - Week 316 - French Redos & Kitchen DIY

Is everybody doing the Friday dance? I am!...not only is it the weekend but one of my friends is coming for a visit and we haven't seen each other in 5 years!! We've both added a baby girl to our families since and it'll be so wonderful to catch up while our kiddos play. Here's to a wonderful weekend to you all filled with coffee, laughter, catching up and friends.

Friday Favorites Features : Week 316 - French Redos & Kitchen DIY

Our Friday Favorites Hosts all choose their Favorites to Feature each week, so make sure you pop over to their blogs and see all of the lovely features! We'd also love it if you'd follow us on social media, leave us a note letting us know you're visiting from Friday Favorites and we'll follow you back!

Friday Favorites Linky Party


Hosted by:
LeroyLime Twitter | Facebook | Google + | Pinterest | Instagram | BlogLovin

and now onto our features from last week's link up!

Metro Cozy : DIY Kitchen Remodel
While I Linger : A Frenchy Craigslist Night Stand
Savvy Apron : DIY French Chair with Graphic
Grandma's House DIY : Red Kitchen Island

If you've been featured this week or in the past, you are welcome to show off the featured button below on your blog :


Thanks again for joining us, please link up below and have a wonderful weekend :


3.30.2016

DIY School Photo Display

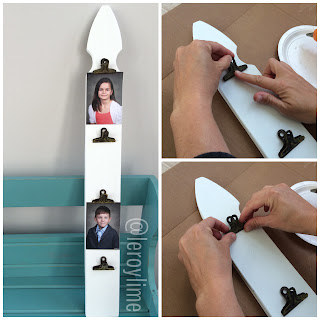
Looking for a way to show off your children's school photos? 
A little elbow grease, paint and hot glue is all you need!

DIY School Photo Display - LeroyLime


I've been eyeing the cute skinny photo holders at Michaels and 
didn't want to fork over the $20 + for one, even with a discount code, 
mine was much cheaper to make and it always feels great to tackle
an easy DIY project!

DIY School Photo Display - LeroyLime

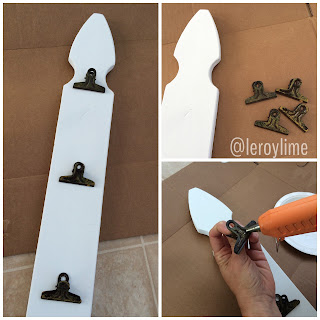
All you need is ONE wooden picket fence post (under $2), 
paint - I used Waverly White Chalk Paint I had on hand, and a bag of clips, 
you can use wooden clothes pins too if you'd like.

DIY School Photo Display - LeroyLime

You can trim your board down but it's not necessary, all depends on how many photos you want on your board. I sanded down the edges quickly and then slapped on a coat of Chalk Paint. Warmed up my hot glue gun and stuck my clips down. 

I screwed two short screws into the back and added a bit of wire for easy hanging on our family command center. You can use the top of a soda can as well but I didn't have any on hand. 

DIY School Photo Display - LeroyLime

Easy peasy and way less than $20, a total win in my book!

3.20.2016

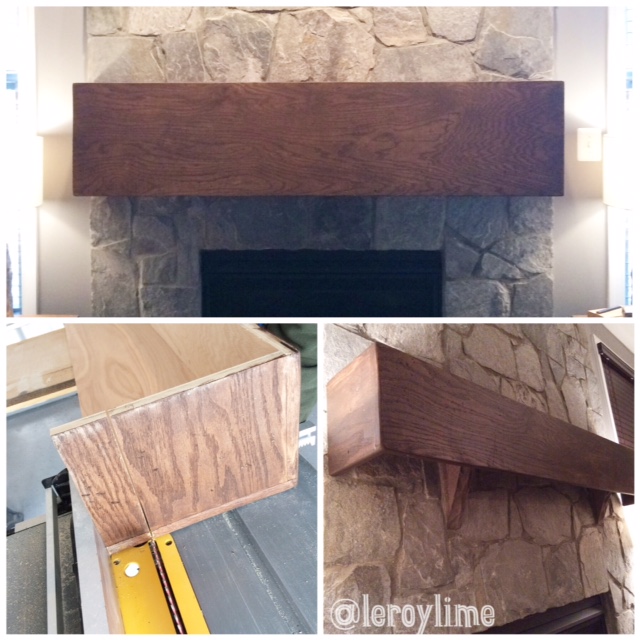
Wooden DIY Mantle Project

When we moved in we fell in love with our fireplace wall...but the mantle, a bit small for my taste just seems to be camouflaged and didn't show it's best self.

Wooden DIY Mantle Project - LeroyLime


So...I hinted another fun project to my dear handy hubby and the following photos will show you what my man went through until we were happy with the final result! 

Wooden DIY Mantle Project - LeroyLime

The first sketches we drew and visions in our head were thus that a large chunky (or so it seemed) piece of wood would cover the current stone mantle shelf. A large box was created and after putting it online asking friends what they though we were building next...a coffin...lol, okay but nope.

Wooden DIY Mantle Project - LeroyLime


A single sheet of 1X16 Red Oak was perfectly cut, sanded and pieced together. It was stained, we mixed two stains together before applying (I have no idea what color they were, sorry) and then we placed said mantle into place...

Wooden DIY Mantle Project - LeroyLime

Wooden DIY Mantle Project - LeroyLime

After taking an online poll, trying out our new 'box' for a few days, we decided we overestimated how big we thought the mantle should be. So my sweet dear hubby cut down his masterpiece a few different times, taking off the entire bottom section that hid the original mantle corbels. 

He also glued in a section of 4X4 that sits just below the original stone mantle, inside the wood mantle, so it's quite solid but removable if future buyers wanted to go back to the original stone.

Wooden DIY Mantle Project - LeroyLime


I love that the bottom is now open, so that we can hang command hooks inside for stockings, a fun alternative to stocking holders that are heavy and sit on top of the mantle (and are a bit dangerous with small children, I might add).

Wooden DIY Mantle Project - LeroyLime

I was so excited to decorate the new mantle that I didn't get around to adding a thin coat of Poly until this Spring and now we are ready for Easter!

Wooden DIY Mantle Project - LeroyLime